Make cryptocurrency payments easy and safe for your business!
ALFAcoins Payment Button allows you to integrate cryptocurrency payments on your website, online shop, internet business, etc. Choose this option when you need to accept donations or you own a shop with a small number of goods.
You can accept payments in Bitcoin (BTC), Litecoin (LTC), Ethereum (ETH), Bitcoin Cash (BCH), Dash, and XRP. Now, for each selling item, you need to create and configure a new button. If you have a large amount of selling goods, you should use our API.
This guide will help you to integrate cryptocurrency support via the Payment Button on your website. Just follow the steps below.
In the first place, access your account at ALFAcoins.com or register a new account (if you don’t have one yet).
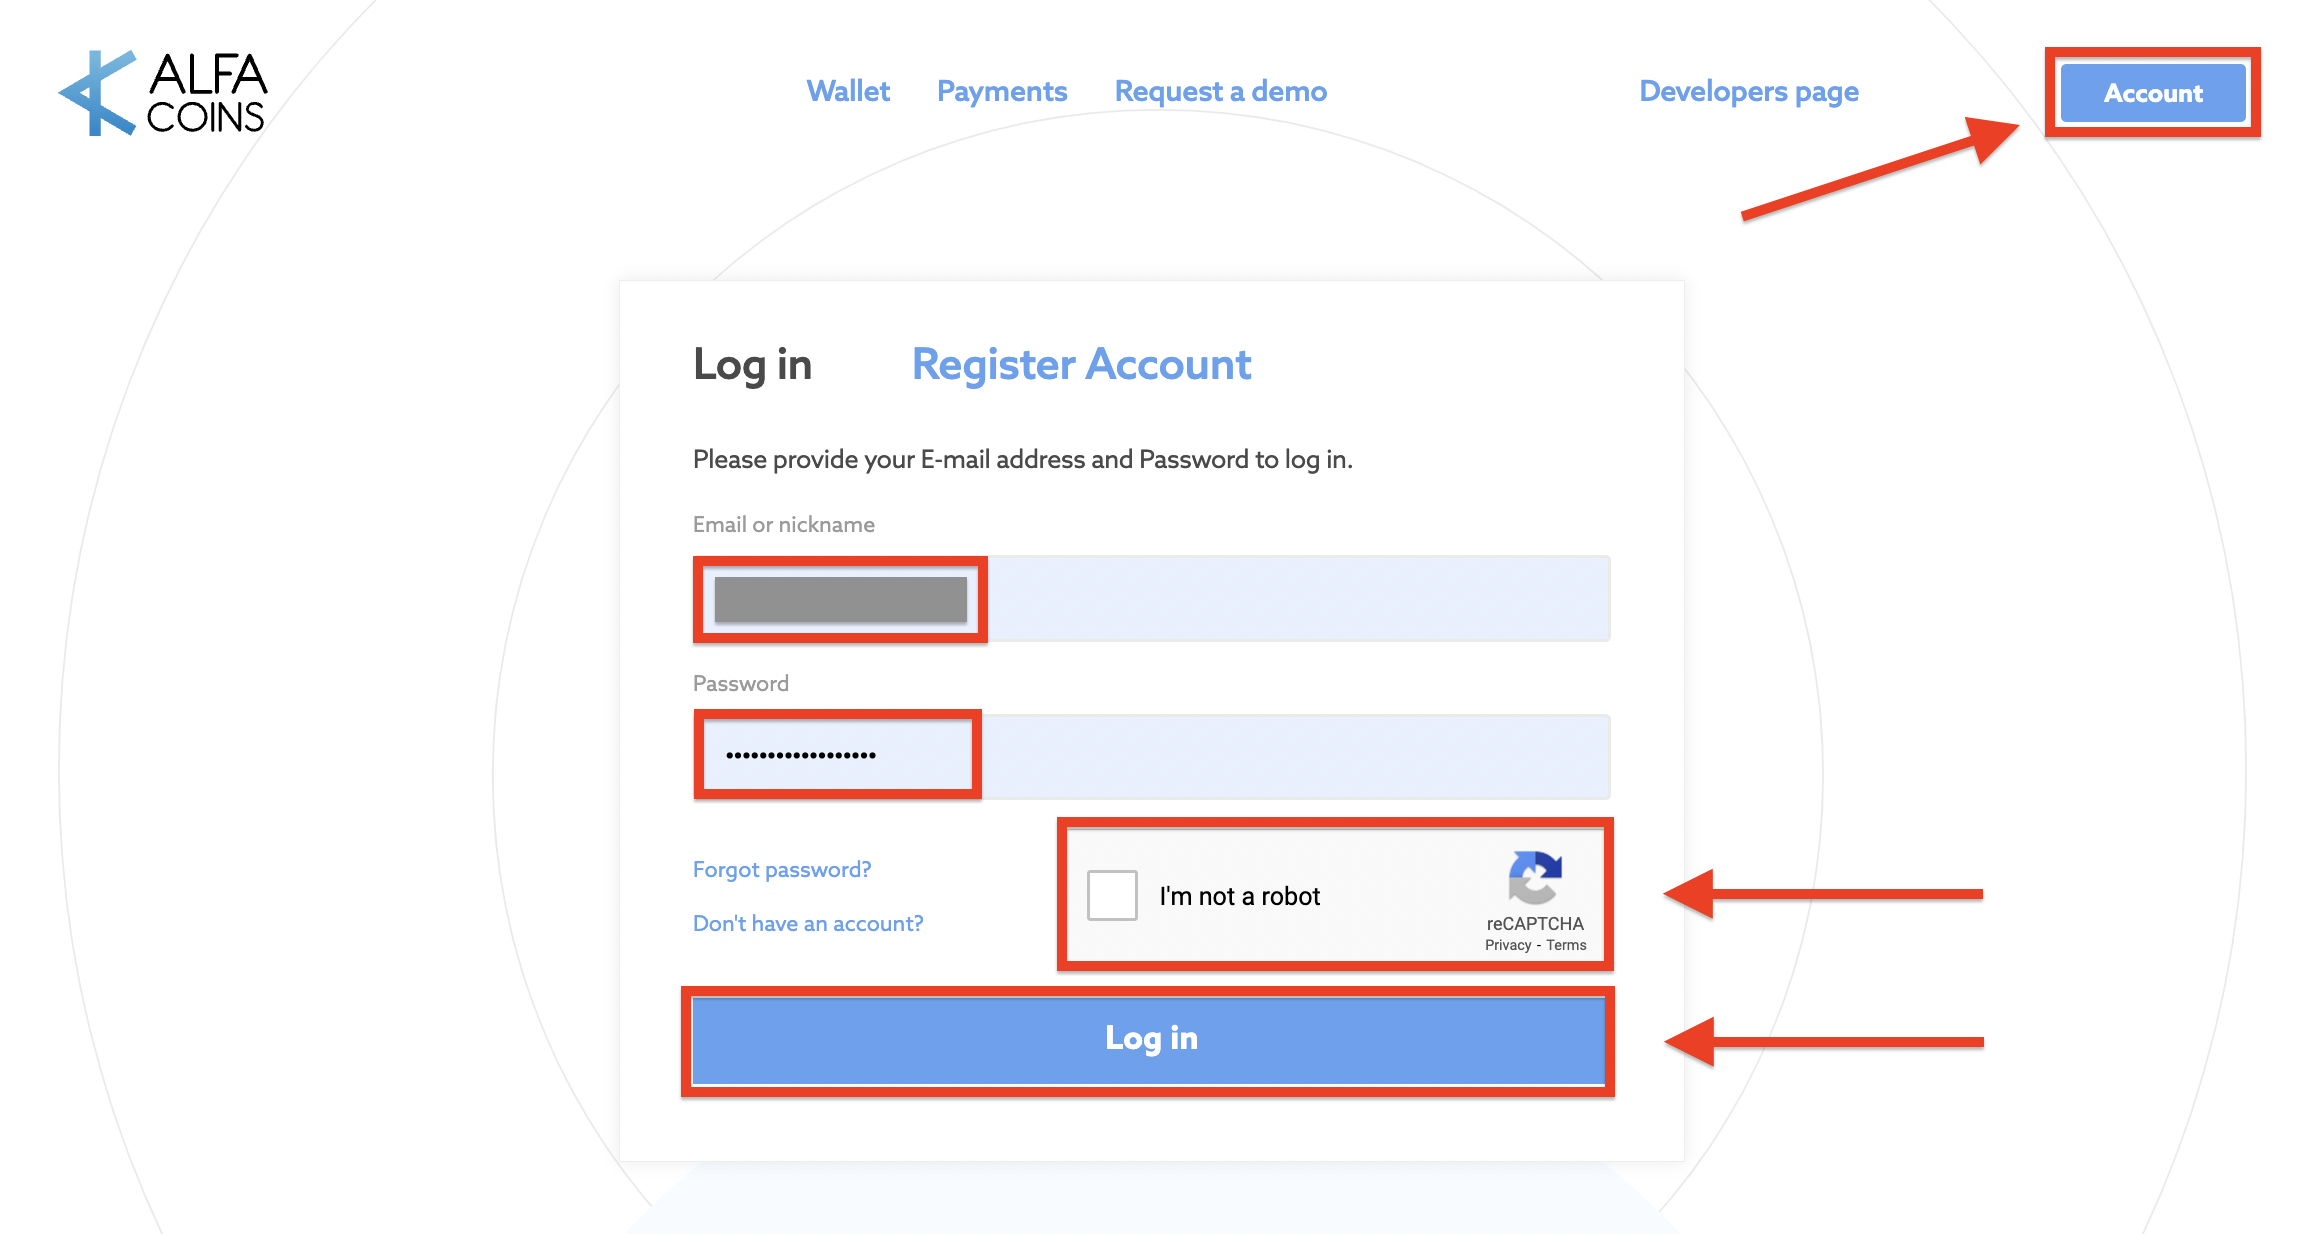
Method 1: Use the Ready Button
You can use the Ready Button to integrate crypto-payments into your website. Find it on Developers Page:
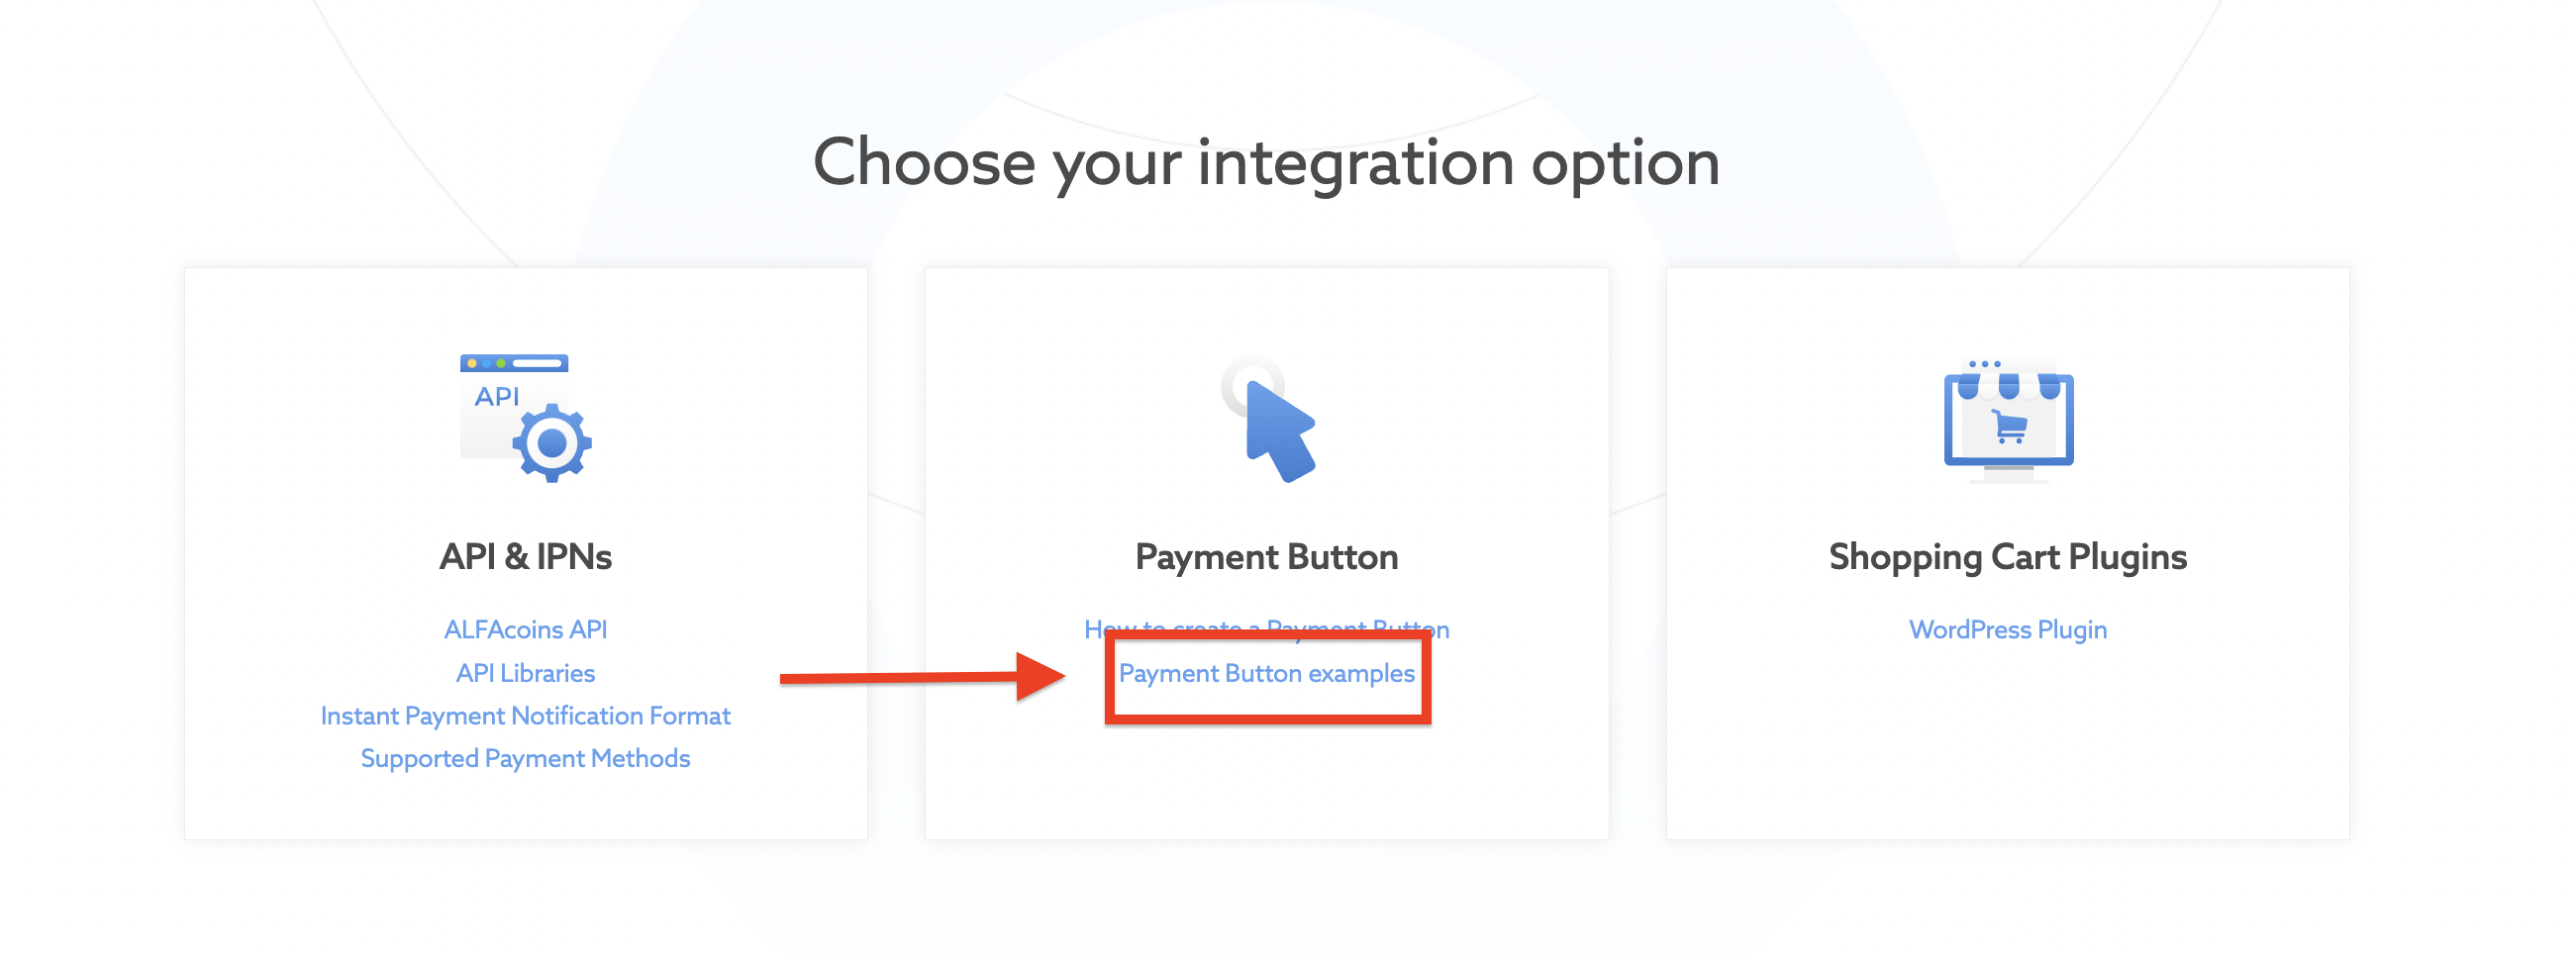
Choose and click the Button design you prefer.
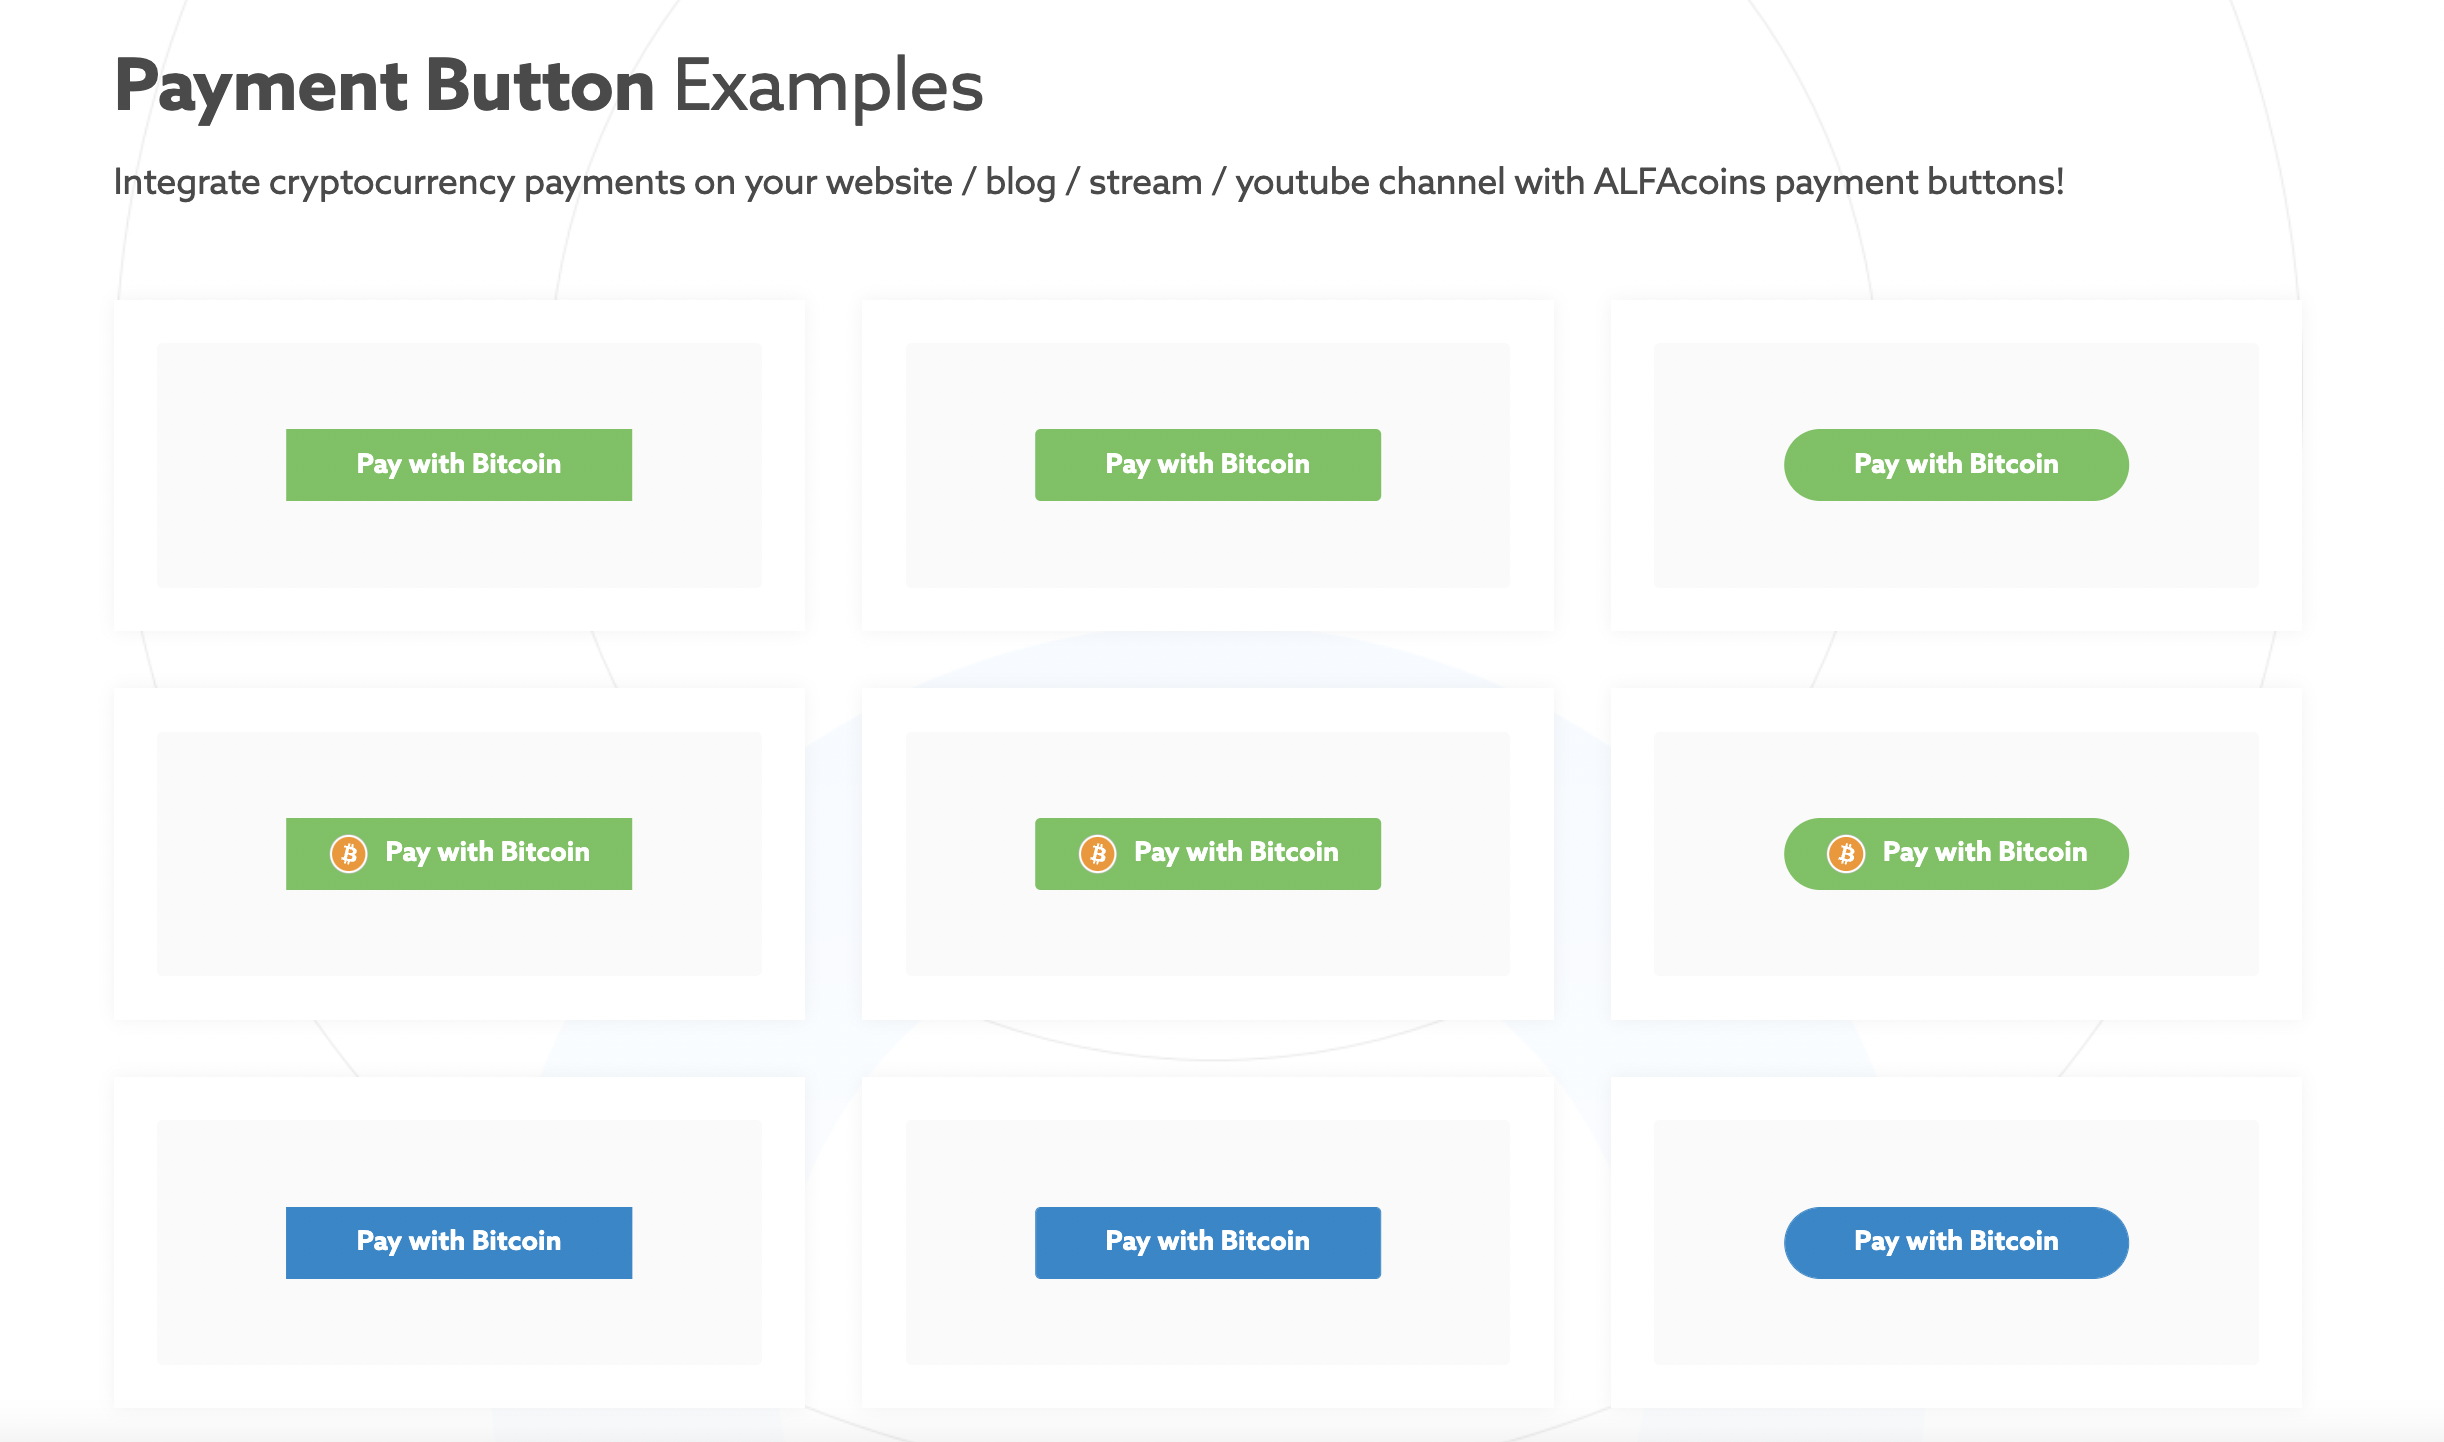
Then set it up for your needs as described in Method 2: “How to Set up your own Button“.
Method 2: Set up your own Button
1. Next, click on the Merchant section on the left menu block and click the Integration button.
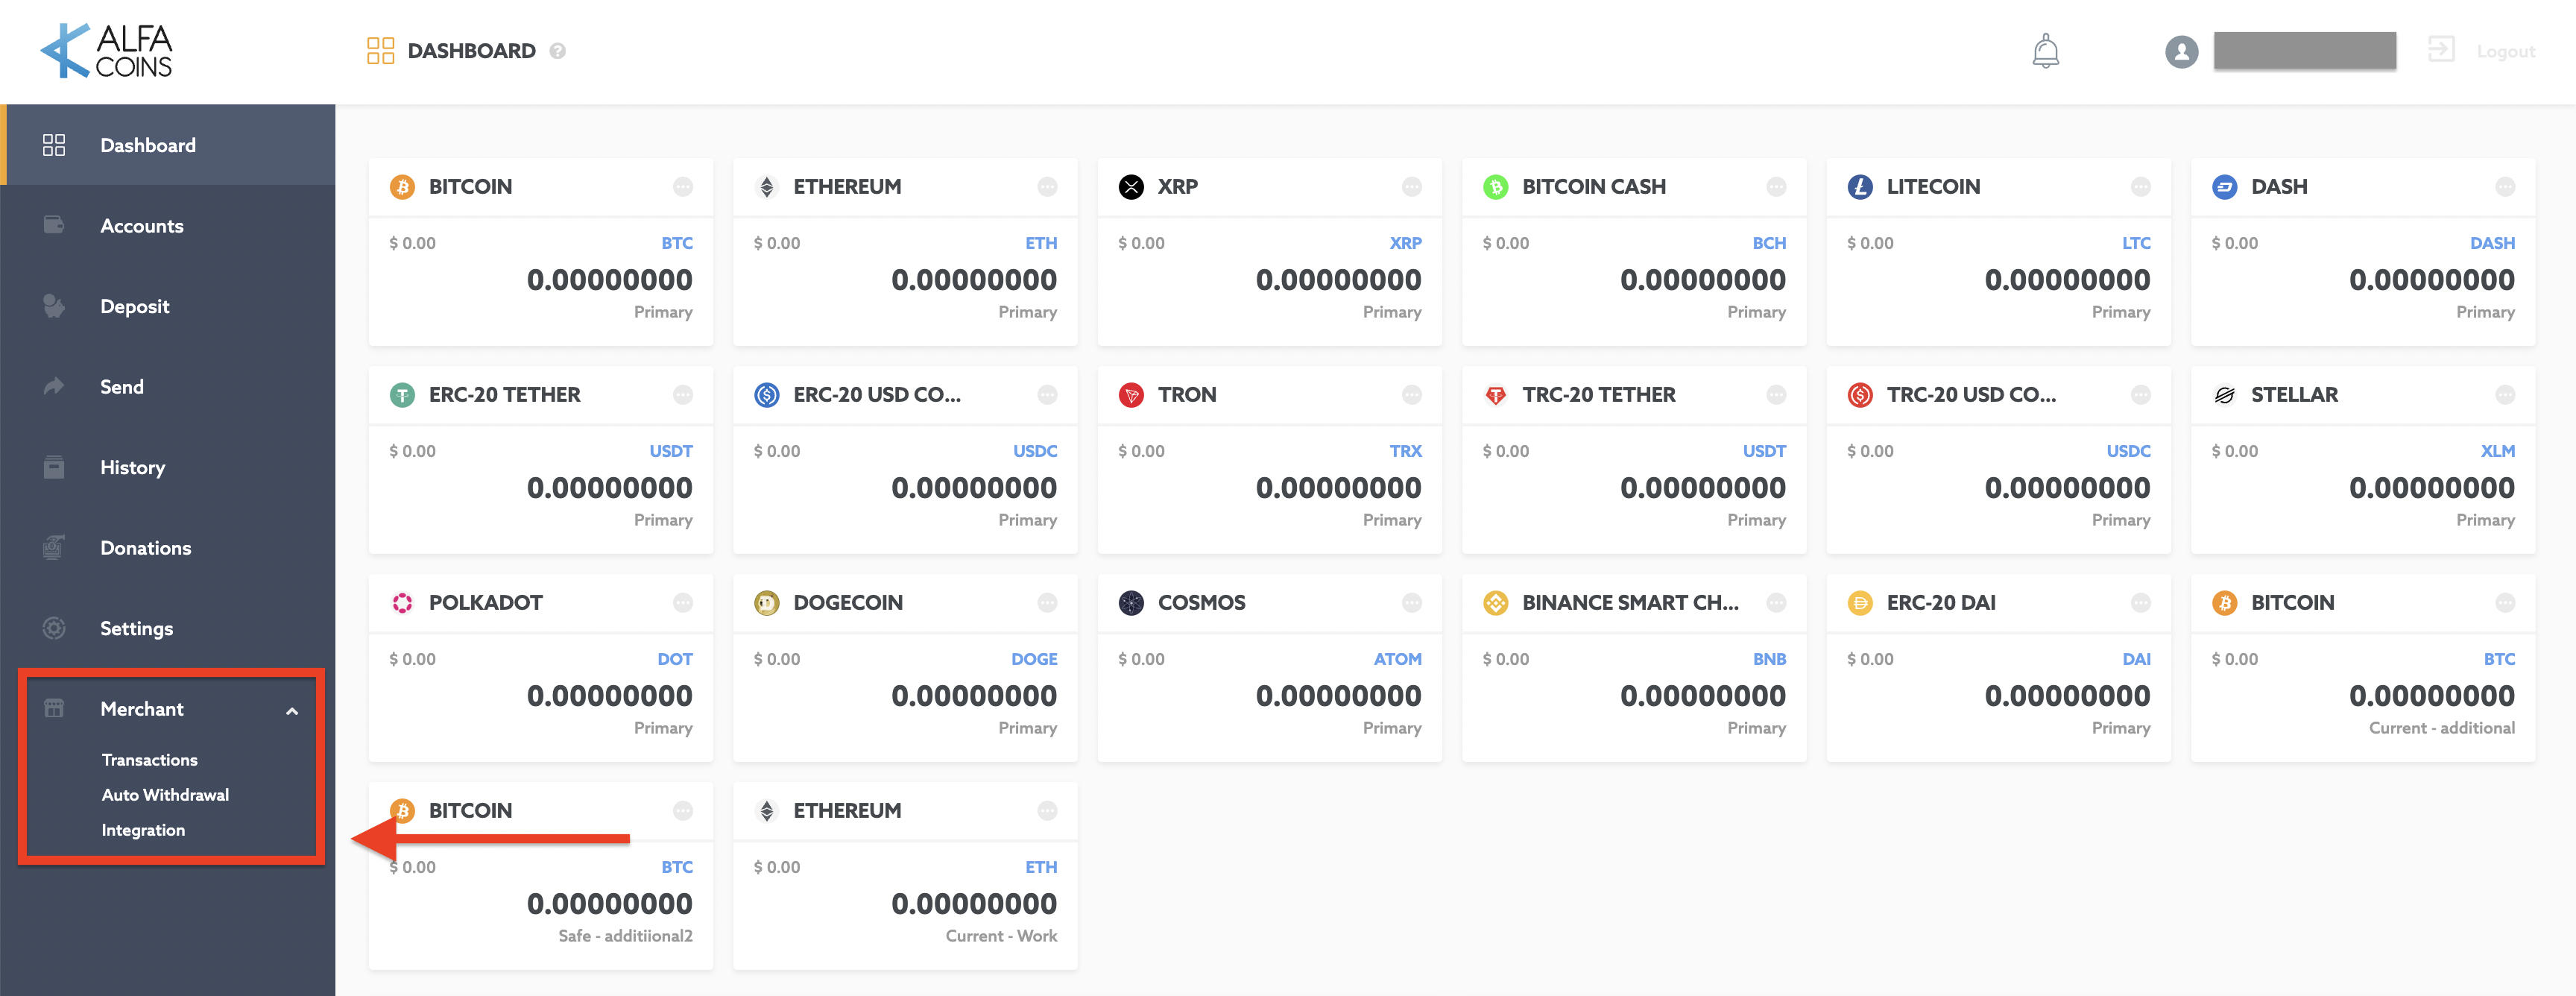
2. Once inside the Integration menu, choose the tab “BUTTON” and click on the “Add button”.
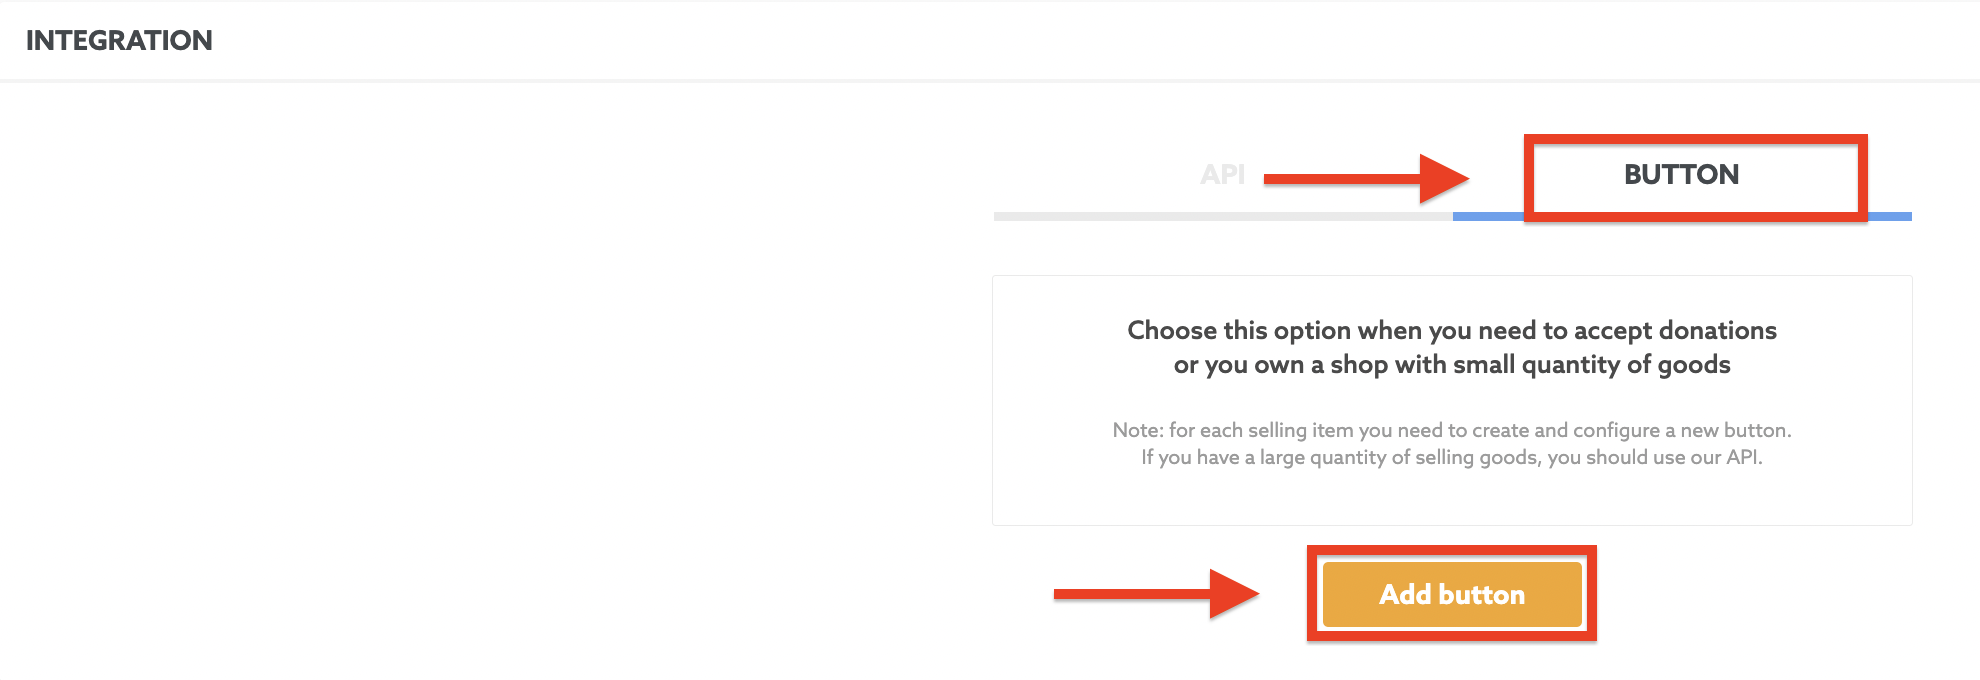
3. Next page is the Button settings page. There you can manage and configure your Payment Button.
Main settings block
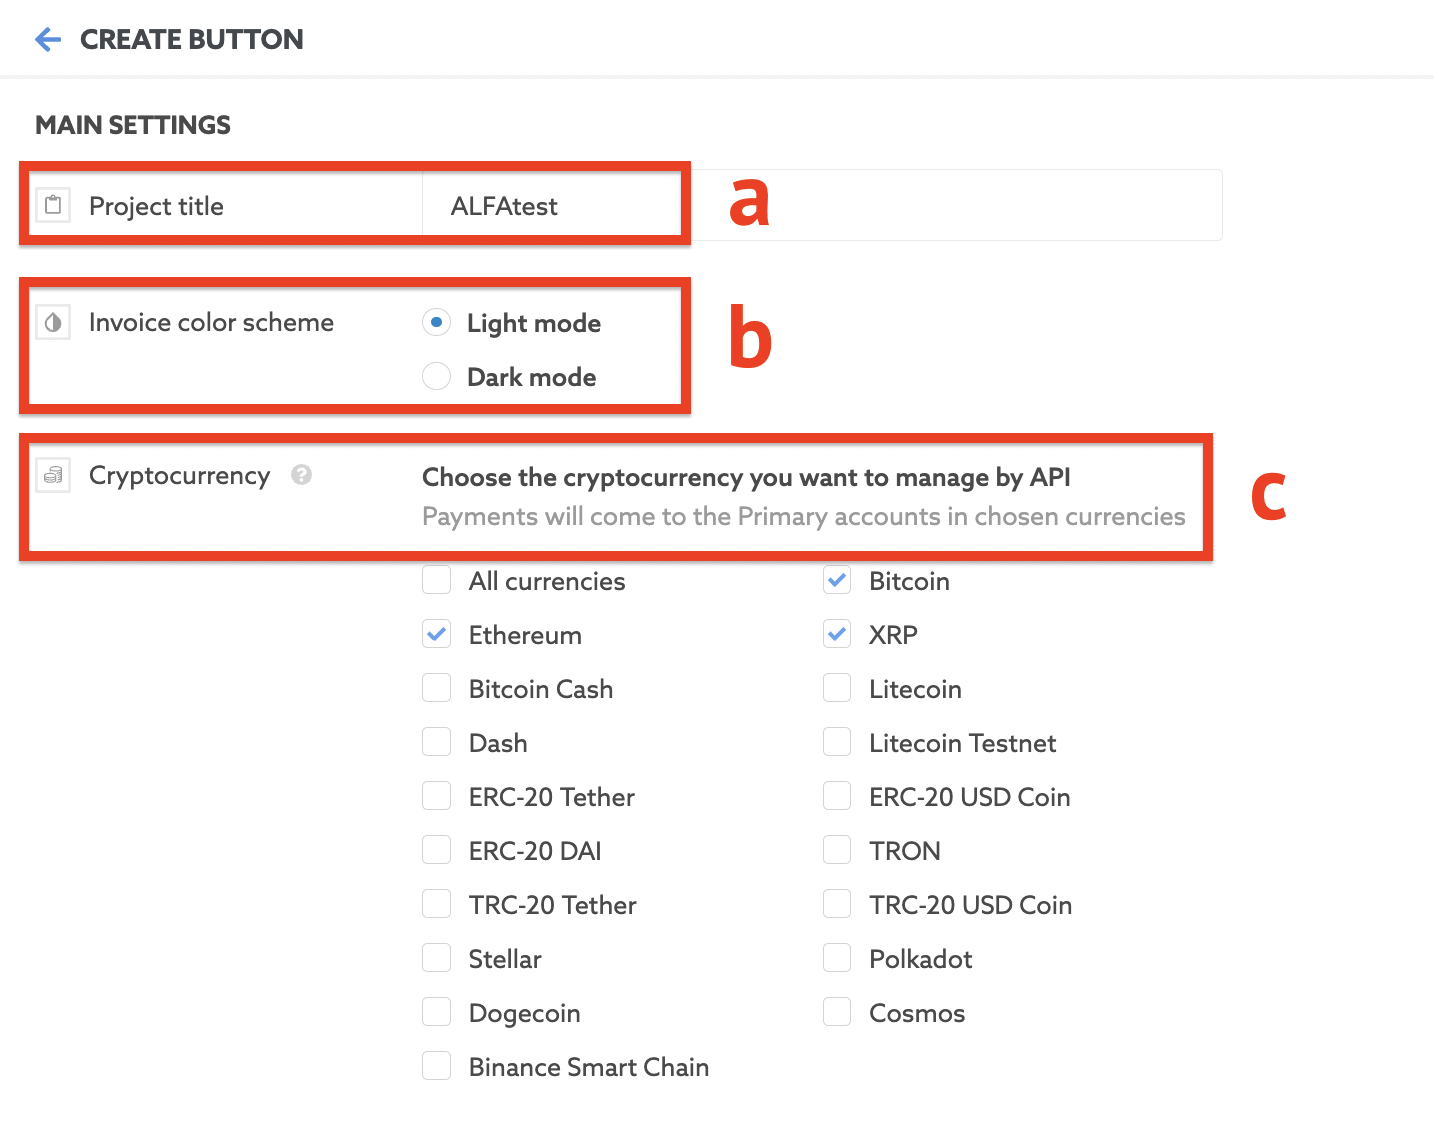
a. Enter your project title or your shop’s name (for example, My Super Shop). This name will be displayed on the payment page for the customer.
b. Choose your invoice color scheme: Light or Dark mode.
c. Choose the cryptocurrencies that will be available for your customers (e.g. Bitcoin, Ethereum, XRP) or just select none, which means all of them will be available as payment.
Bitcoin
Litecoin
Ethereum
Bitcoin Cash
Dash
XRP
Tether ERC-20
USD Coin
Binance Smart Chain
Cosmos
Polkadot
Stellar
Dogecoin
Payments will come to the Primary accounts in chosen currencies.
d. In the next step, you can configure who will pay the service's fees.
- Merchant Fees will be deducted from the Merchant account
- Customer Fees will be applied to the Invoice/Payout amount

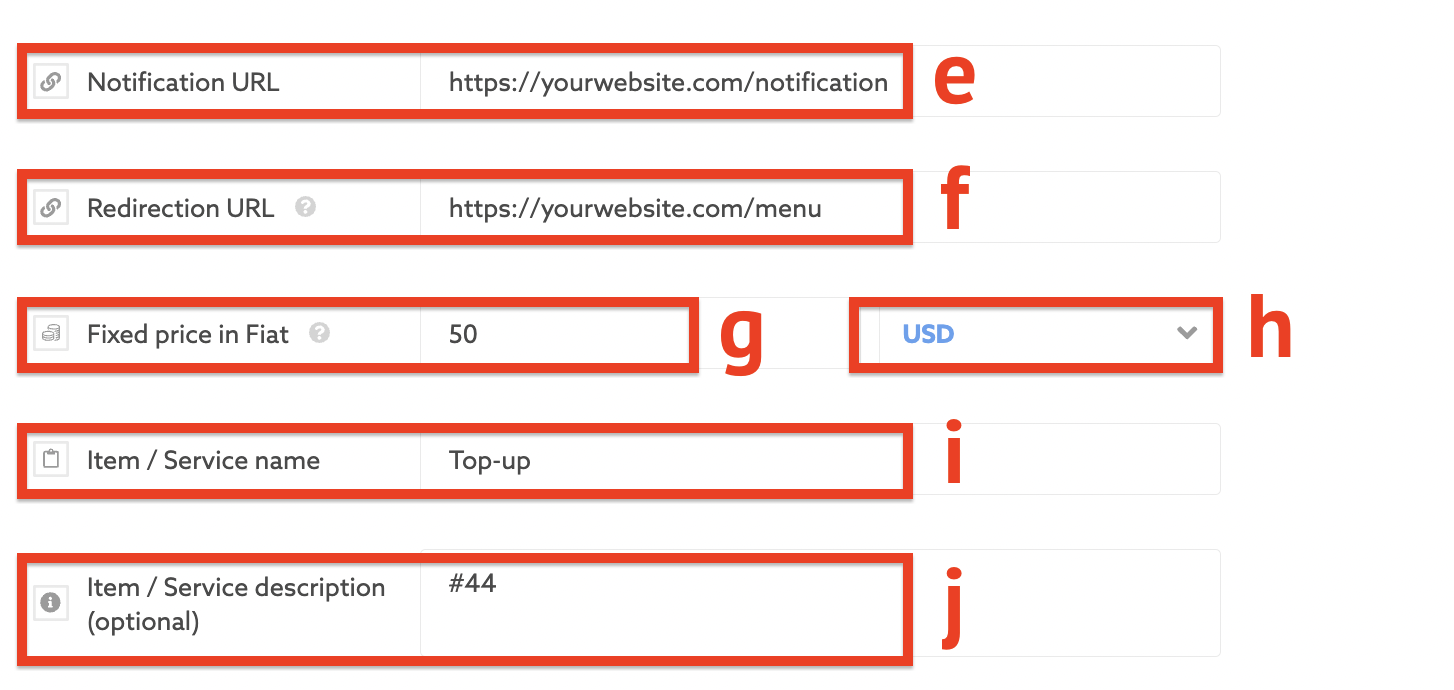
e. Fill the Notification URL field – your notification url has to contain one of your verified websites.
f. Fill the Redirection URL field – this is a link to your website (URL). The customer will be redirected there after the payment.
g. Set the fixed price of your item.
h. Choose the fiat currency of your project. More than 150 currencies are available.
i. Enter the item or service name - your product name will be displayed on the payment page (e.g. Bass guitar).
j. Enter the item or service description - your product description will be displayed on the payment page (e.g. Product #44).
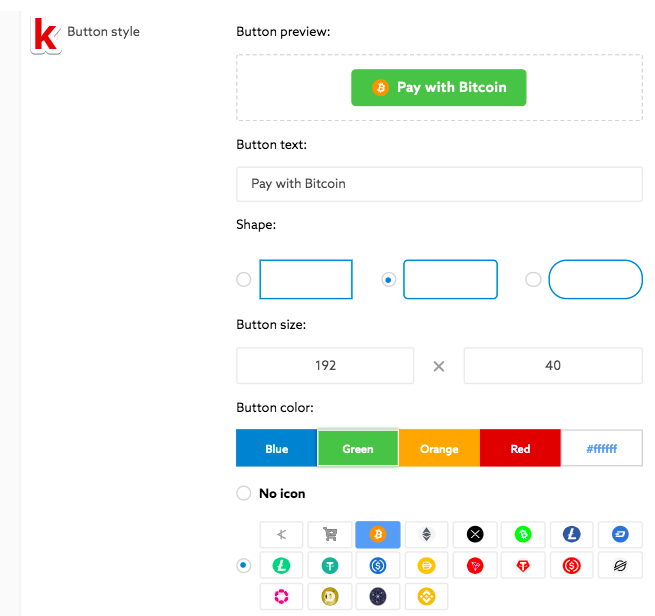
k. You’ll be offered different options for graphic design. Please select the one you like:
- Enter the Button name
- Choose the Button shape
- Enter the Button size or leave it by default
- Choose the Button color
- Choose the Button icon
Click “Save”.

4. Congratulations, your first button has been successfully created!
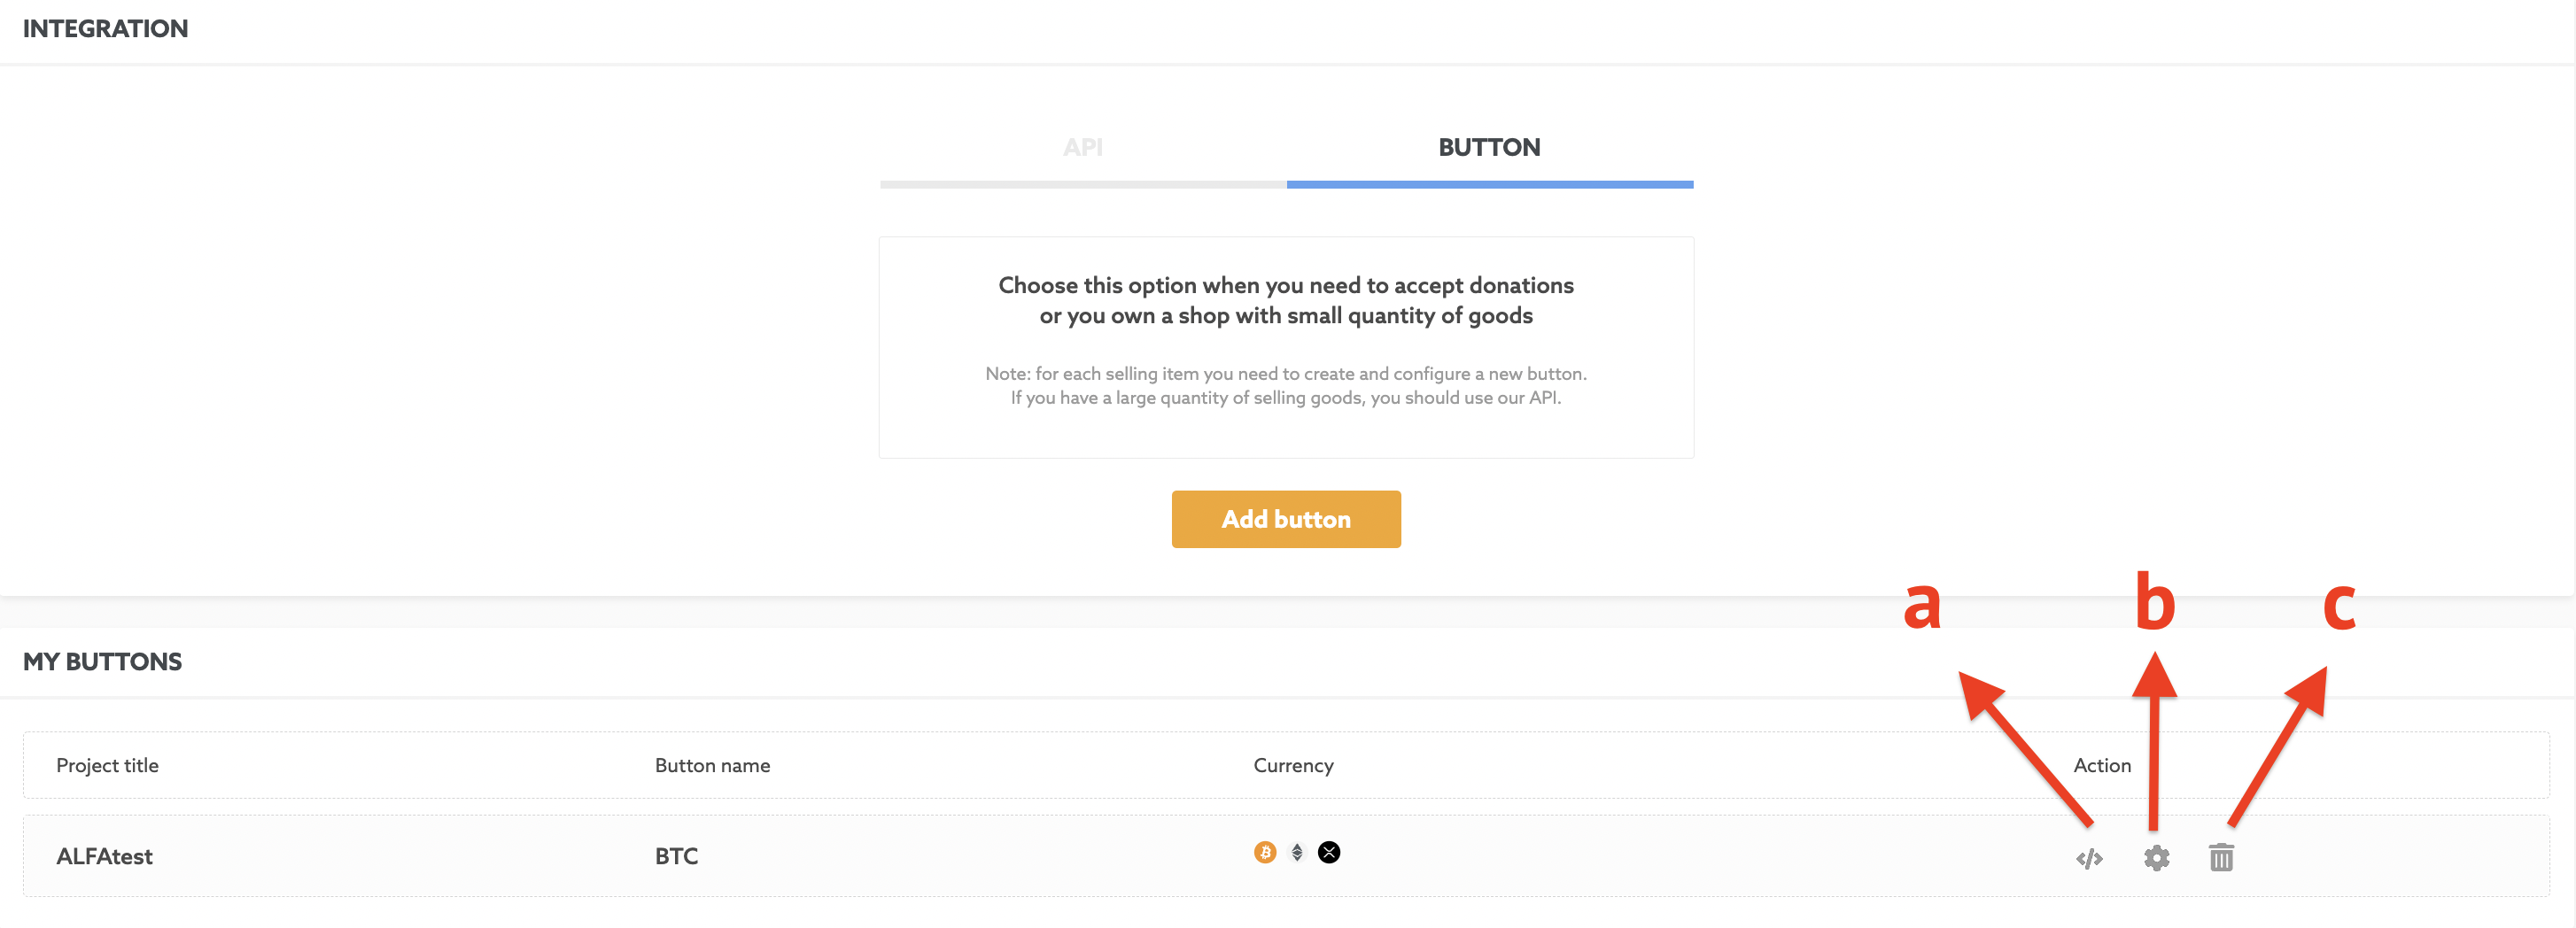
Now, on the Integration section and the tab “Button”, you will find the list of your created buttons. Here you can:
a. Copy the button code to integrate it on your website
b. Set up the button
c. Delete the button
5. Copy the created code and paste it code on your website where you want the button to appear. Example:

Congratulations, you’ve just integrated cryptocurrency payments on your website!
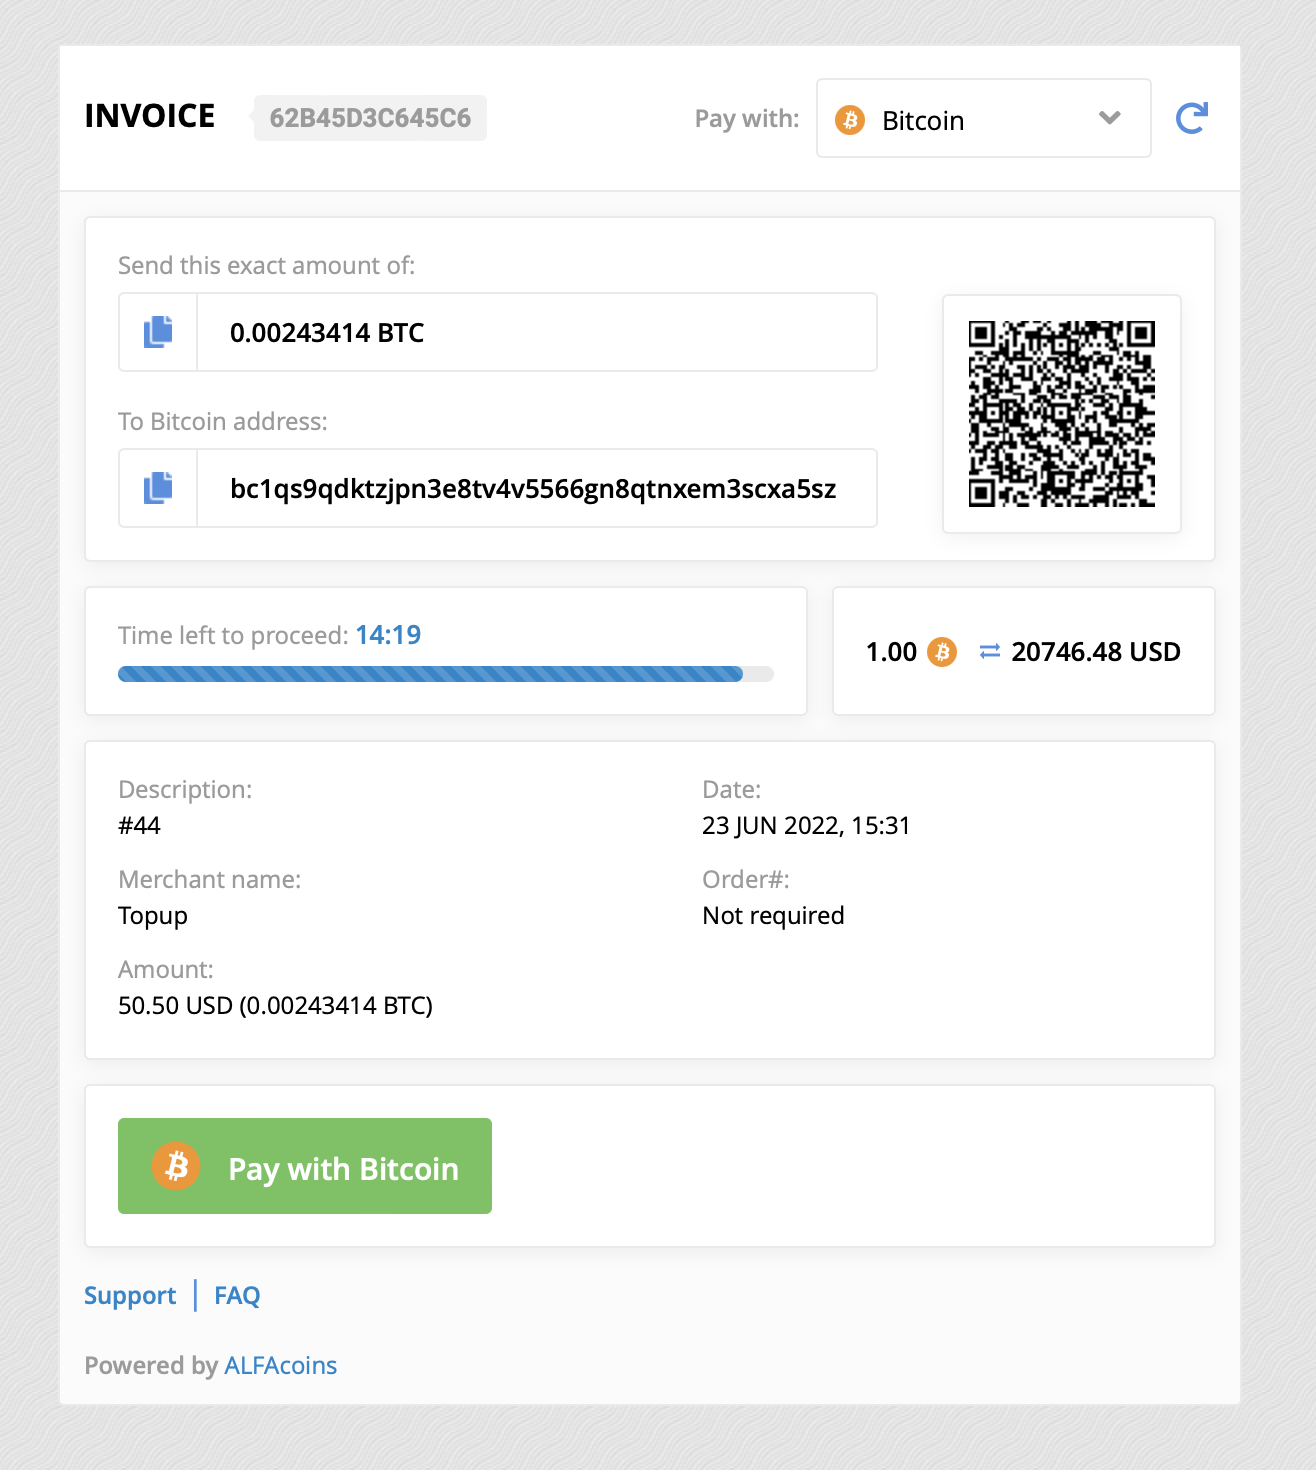
6. After your customer creates the order in your online shop, they will receive the invoice to pay.
The payment page will look like this:
If something isn’t working or you’re having an issue in setting up your store, don’t hesitate to ask our support team!