Now you can make cryptocurrency payments easier and safer for your venture. The ALFAcoins’ Application Programming Interface (API) is a simple tool that allows you to integrate cryptocurrency payments on your website, online shop, Internet business, online game, etc.
Choose this option instead of the payment button when you own a shop with a large number of goods. Accept payments in Bitcoin (BTC), Litecoin (LTC), Ethereum (ETH), Bitcoin Cash (BCH), Dash (DASH), and XRP (XRP).
With the ALFAcoins API, you can create and manage invoices, issue refunds, retrieve real-time rates information, and much more. This manual will help you to integrate cryptocurrency support via ALFAcoins API.
Just follow the steps below.
1. ALFAcoins API setup
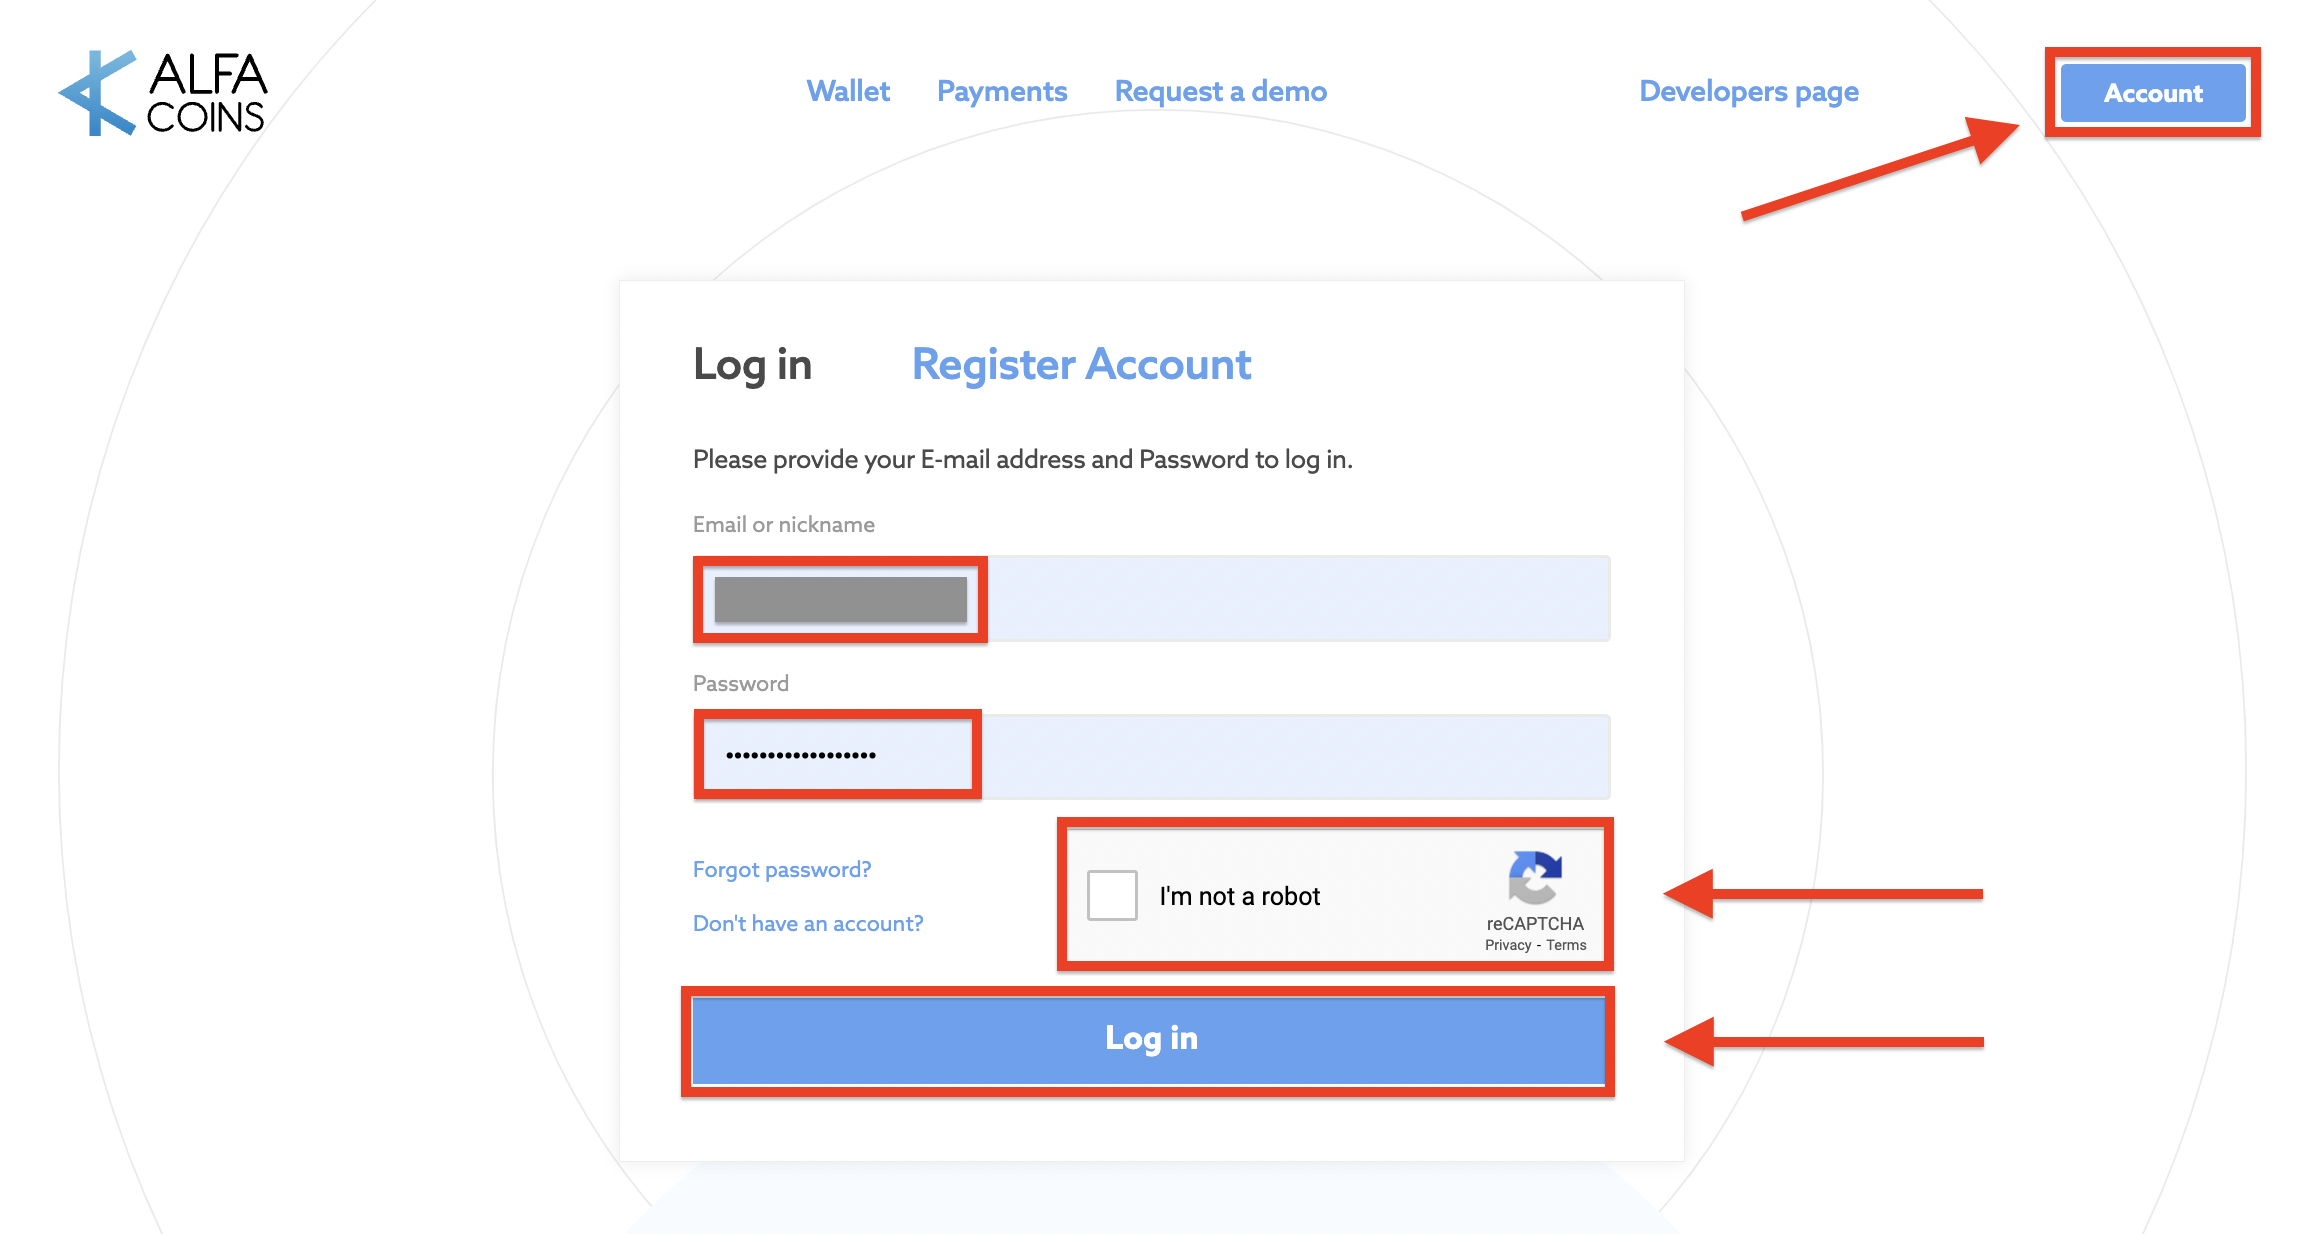
1.1 Access your account at ALFAcoins.com or register a new account (if you don’t have one yet).
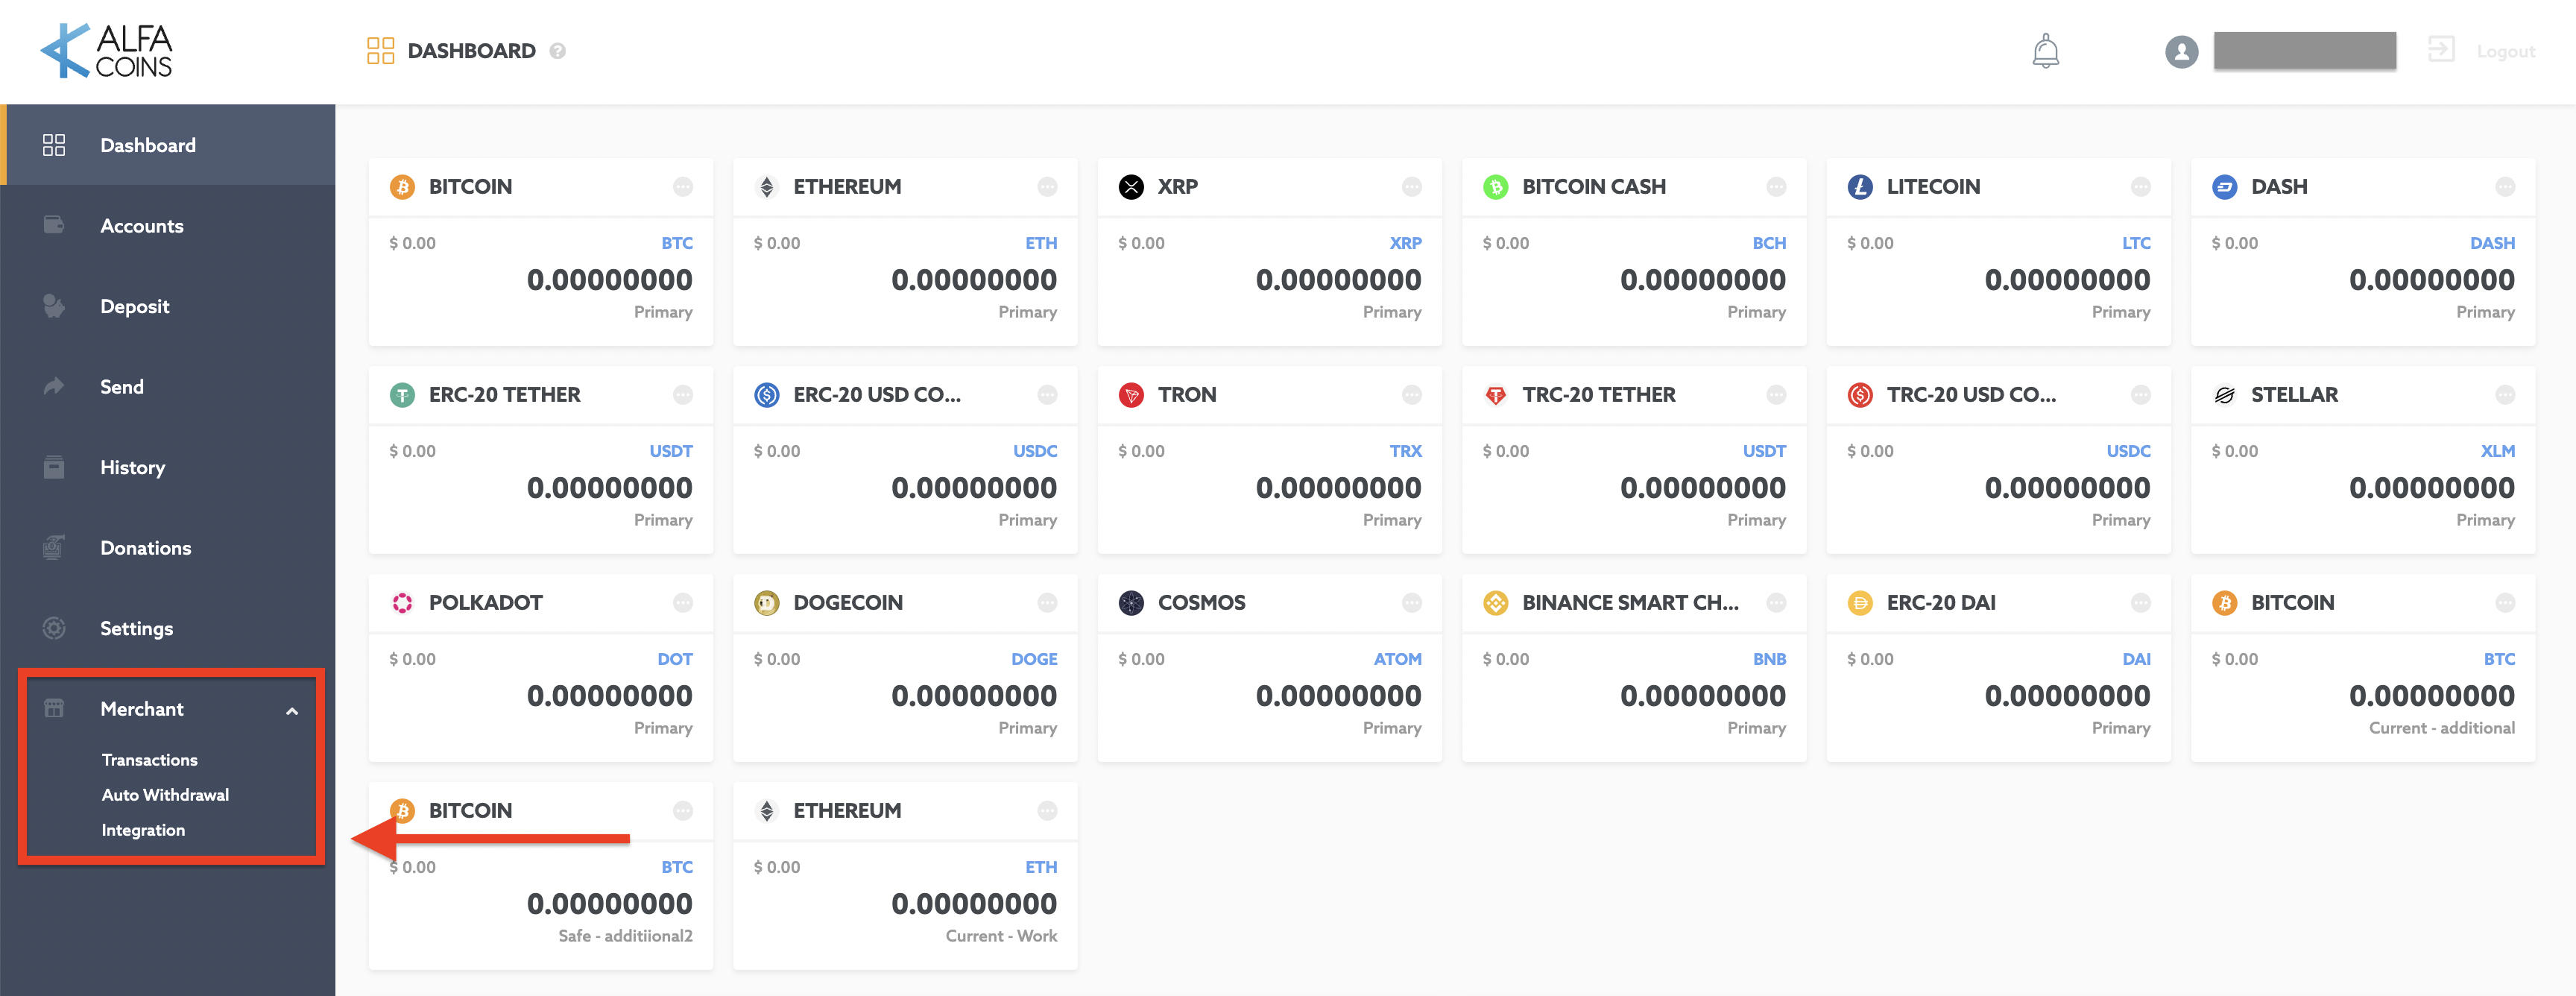
1.2 Next, click on the Merchant section on the left menu block and click the "Integration" button.
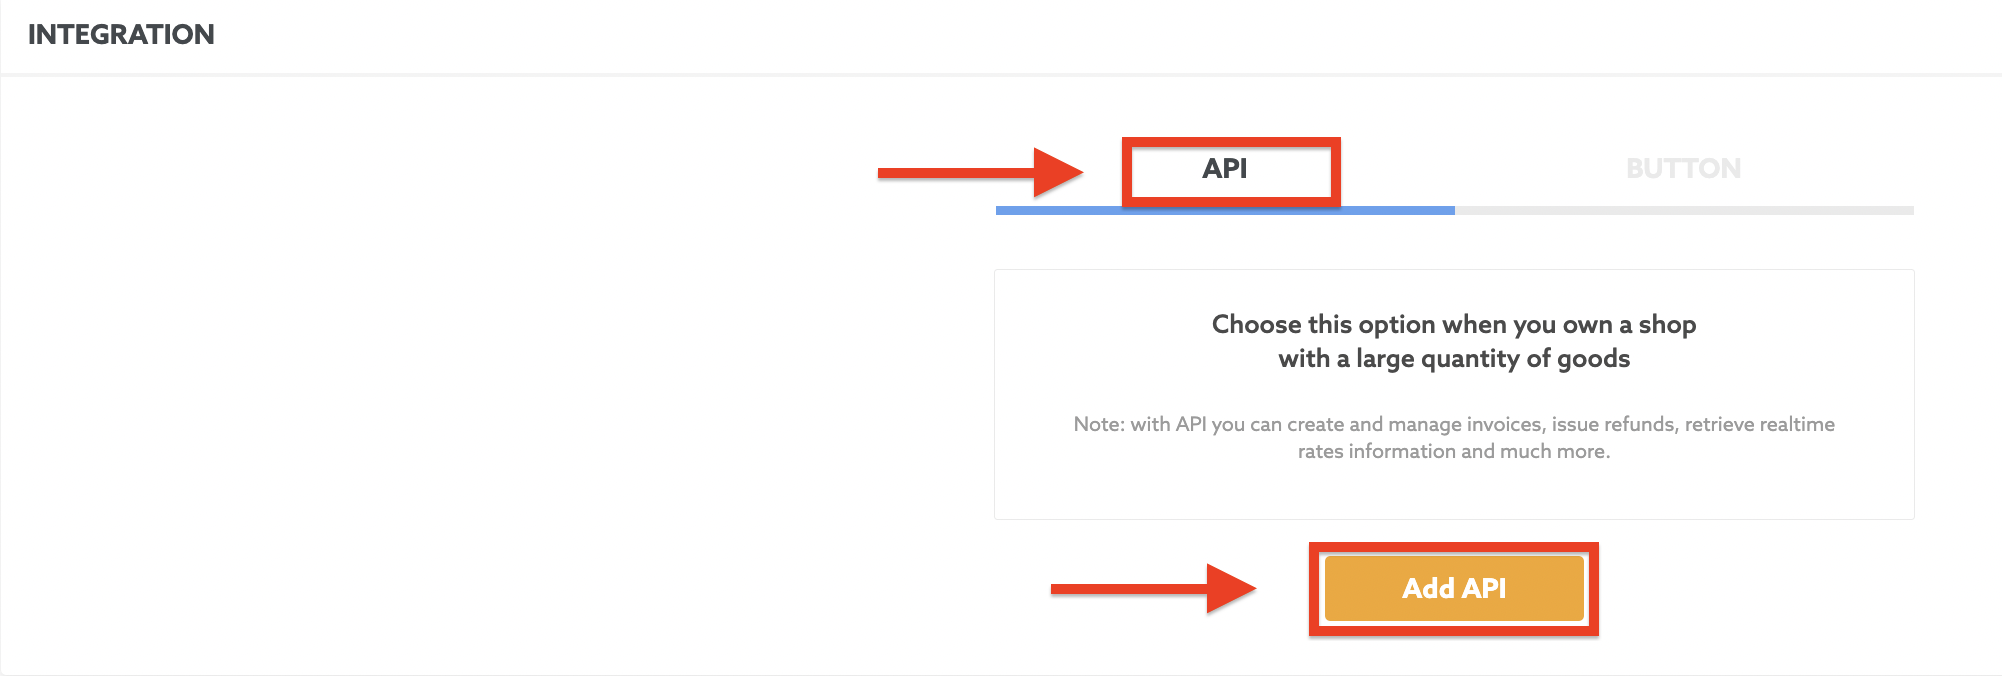
1.3 Once inside the Integration menu, choose the tab “API” and click “Add API”.
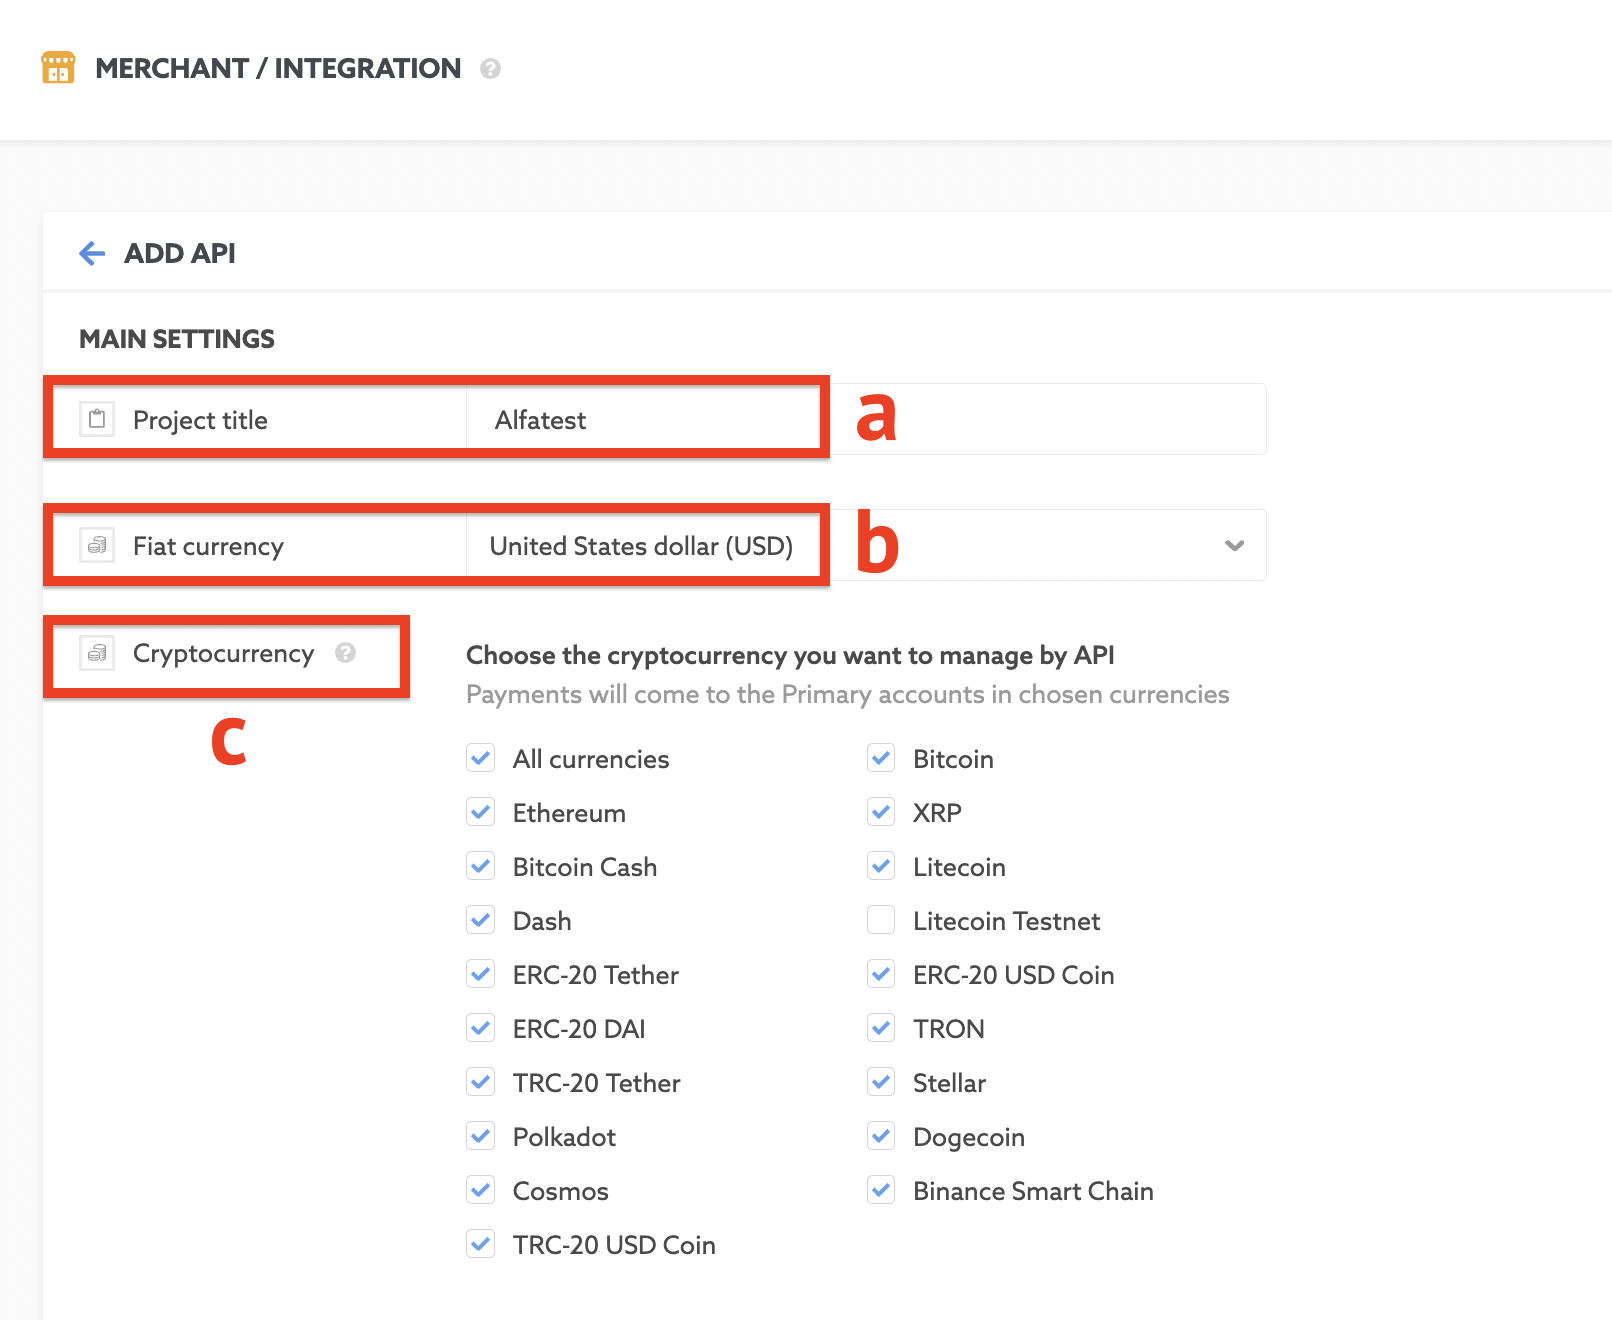
1.4 Next page is the API settings page. Here you can manage and configure your API for your business needs. Let’s take a look.
Main settings block
a. Enter your project title (website, online shop, Internet business, online game, etc.)
b. Choose the fiat currency of your project. More than 150 currencies are available.
c. Choose the cryptocurrency you want to manage with the API. You can choose here any supported cryptocurrency:
Bitcoin
Ethereum
XRP
Bitcoin Cash
Litecoin
Dash
Litecoin Testnet
ERC-20 Tether
ERC-20 USD Coin
ERC-20 DAI
TRON
TRC-20 Tether
Stellar
Polkadot
Dogecoin
Cosmos
Binance Smart Chain
Payments will come to the primary accounts in the chosen currencies.
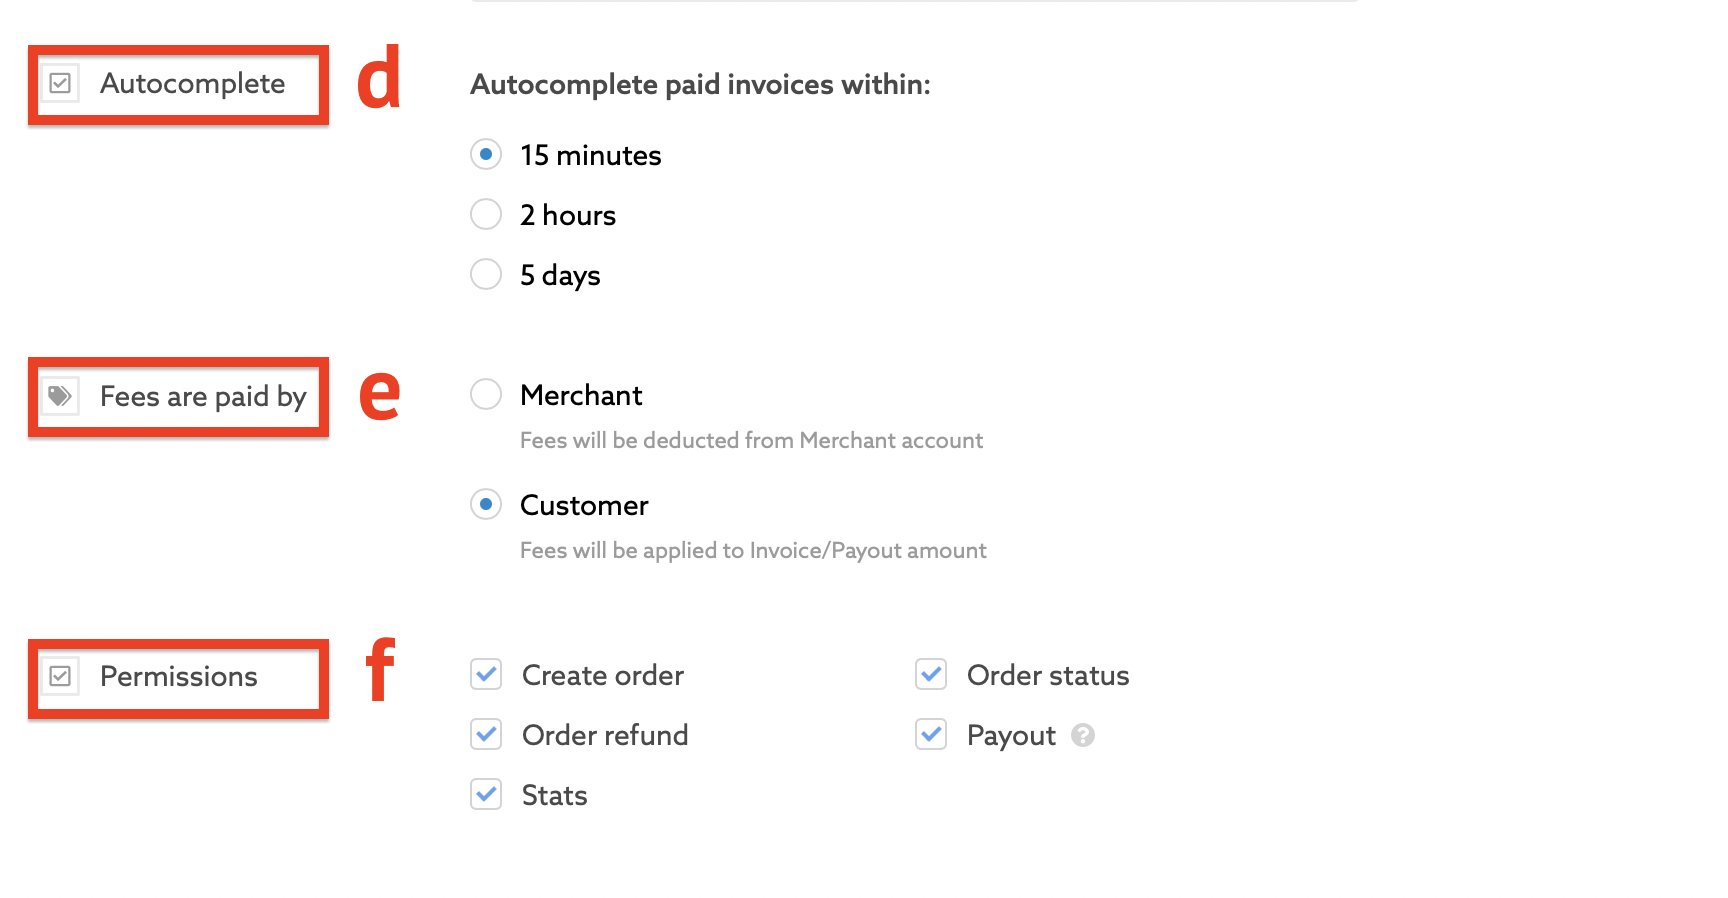
d. Next, choose the period for auto-complete the paid invoices. The invoices with unconfirmed transactions will be completed automatically after the period expires.
e. After that, you can configure who will pay the service's fees.
- Merchant - Fees will be deducted from the Merchant account.
- Customer - Fees will be applied to the Invoice/Payout amount.
f. Check and choose the permissions you need.
Security settings block
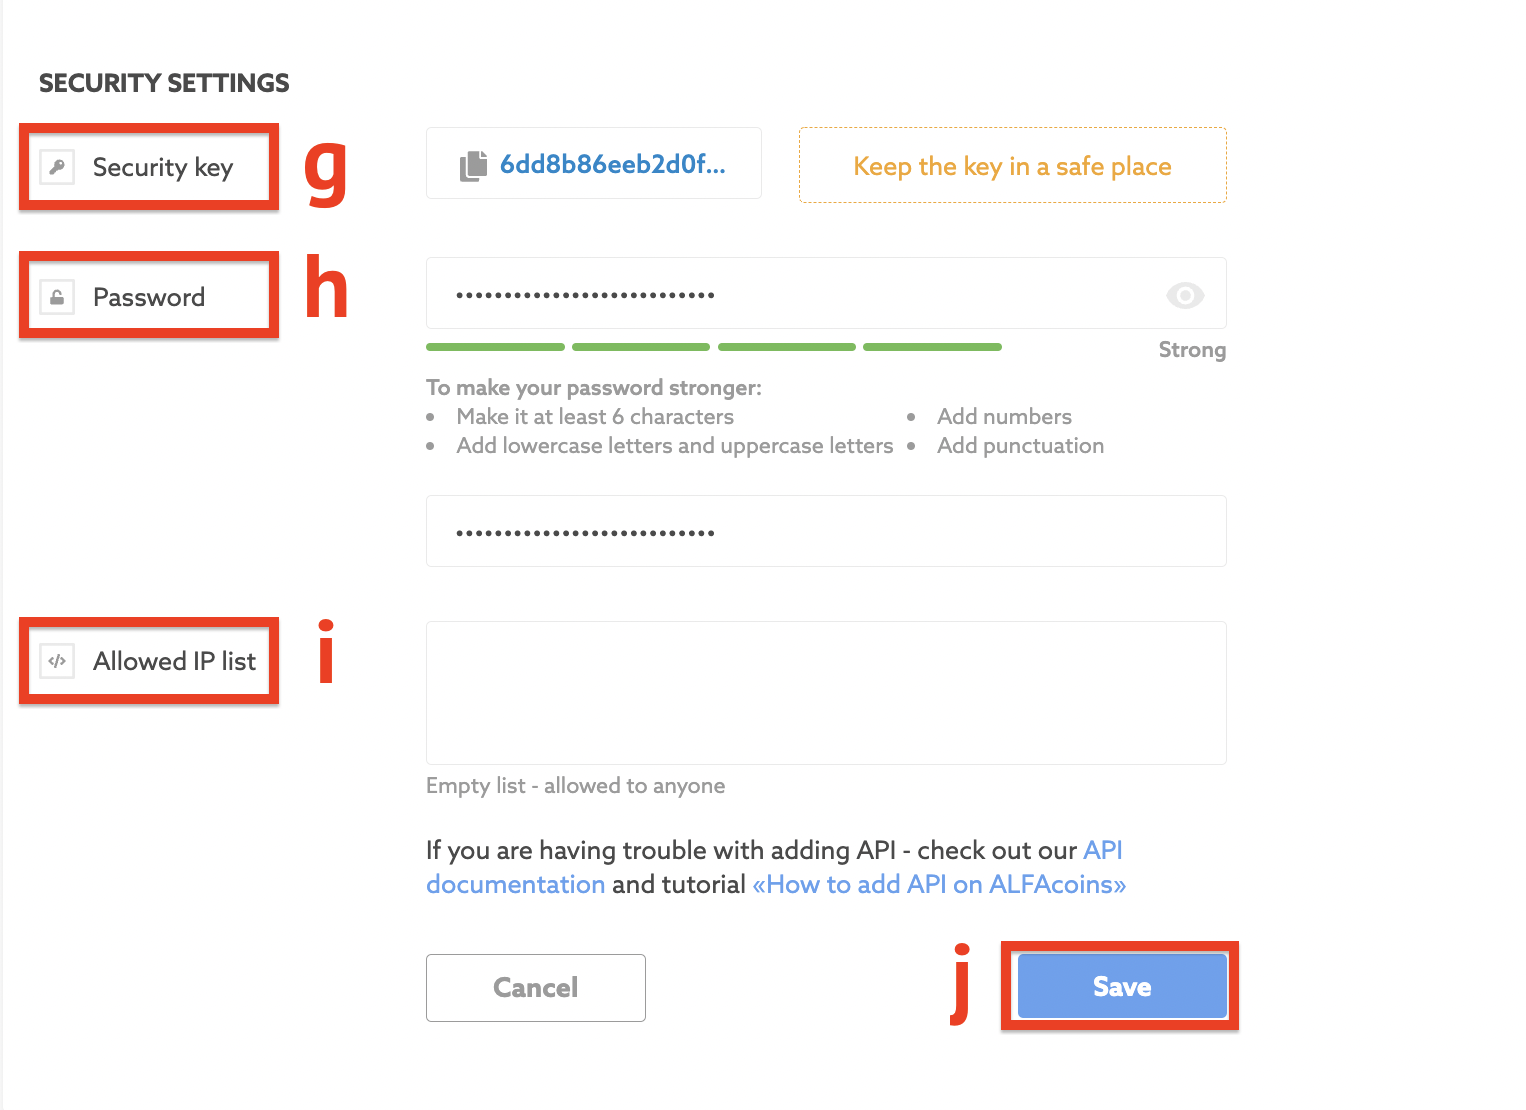
g. Your private security key – you’ll need it to get access when connecting to API.
It’s provided by ALFAcoins when you connect the API for the first time.
Keep this key in a safe place!
h. Password - your password for the API access. You can set and confirm it by yourself.
* Don’t forget to set a strong password using lowercase and uppercase letters, numbers, and symbols. Make it at least 6 characters.
i. Allowed API list – you’ll be able to send a direct request to the API only from these IP addresses.
If you leave it blank – any computer will be allowed to handle your account.
j. After you made the changes, click the Save button.
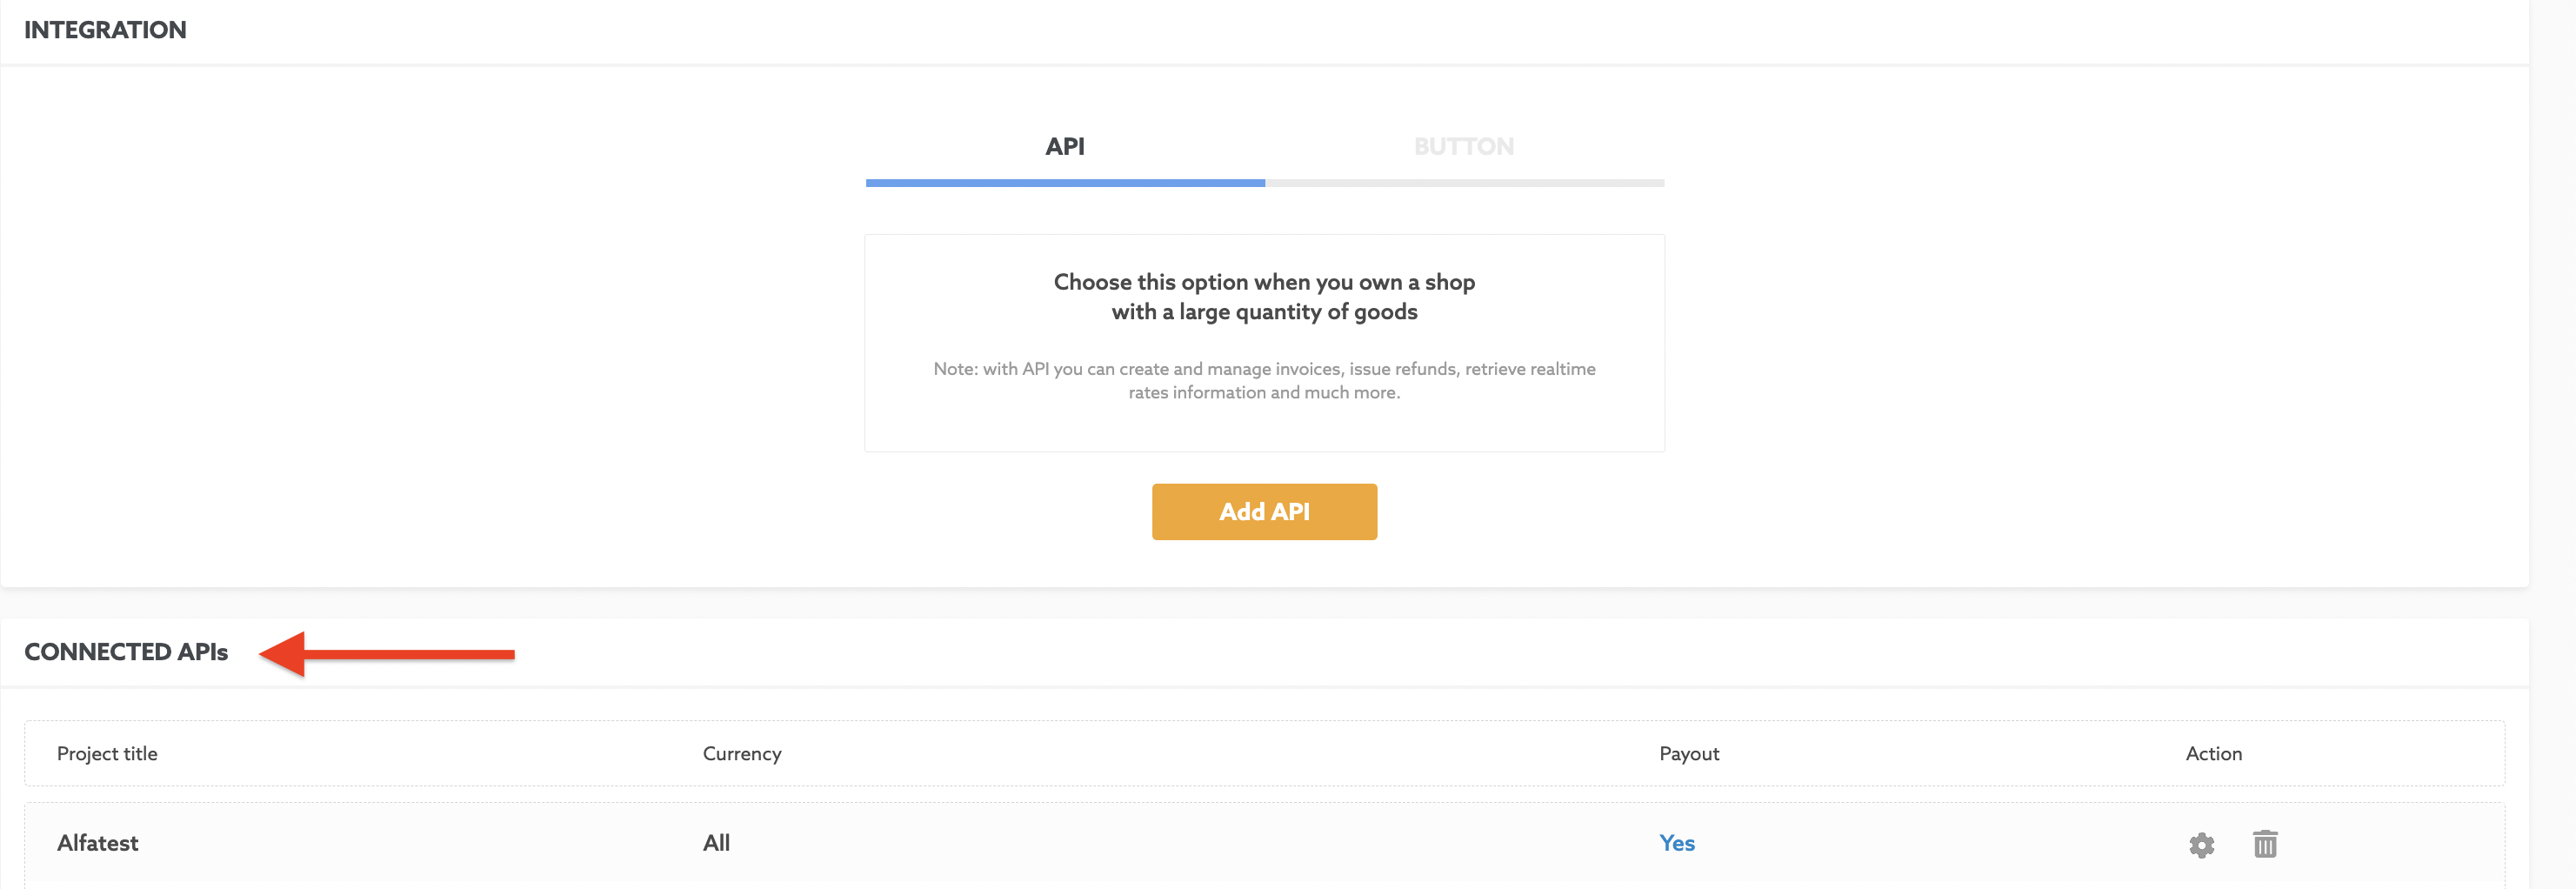
Congratulations! You’ve just added and configured your API.
2. Install on WordPress
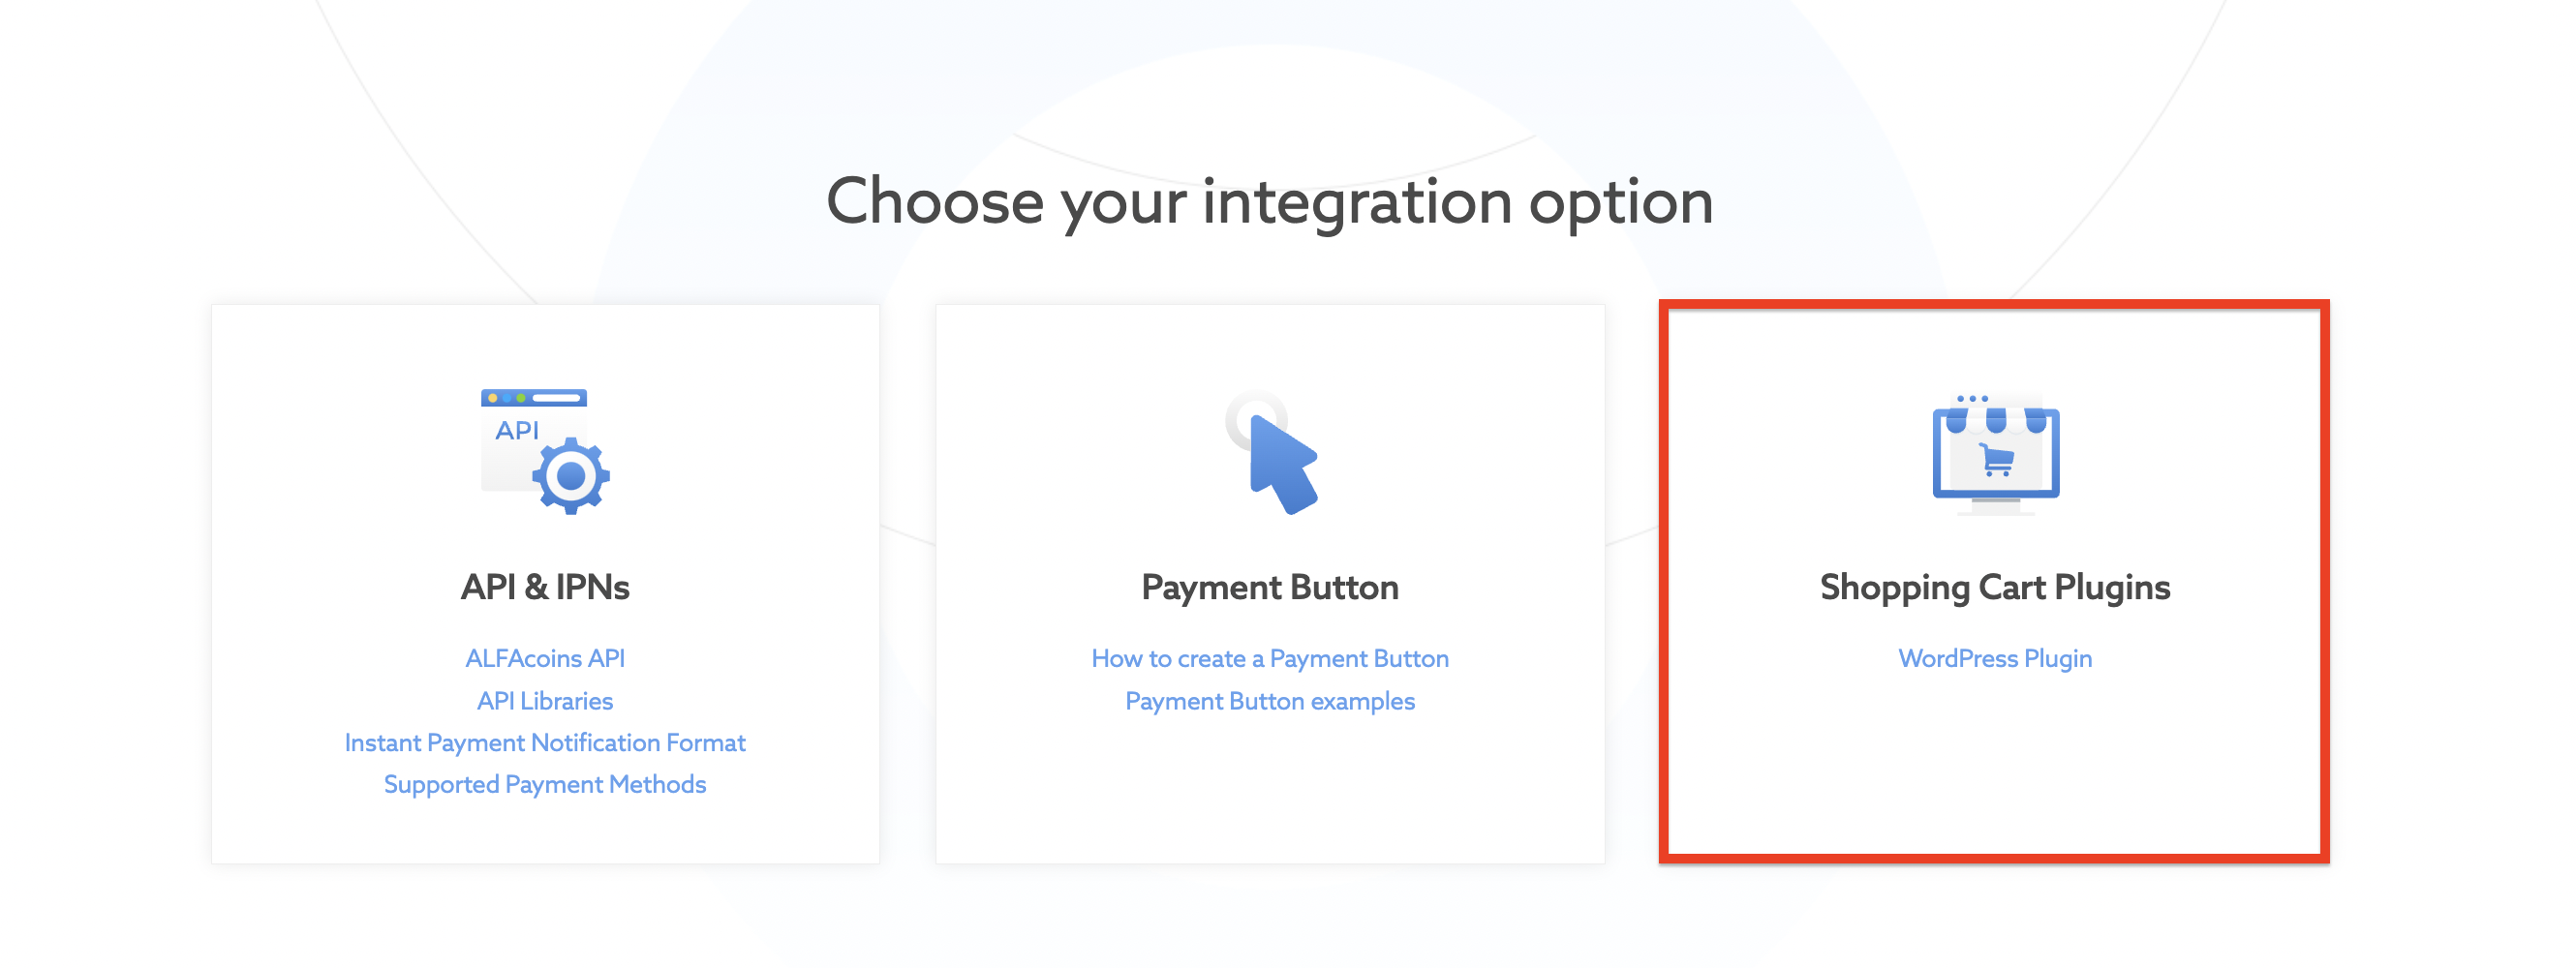
2.1. Open Developers Page on ALFAcoins.com and choose Shopping Cart Plugins by clicking the WordPress Plugin.
2.2. Download the plugin for WordPress by clicking on the "Download" button.

3. Woocommerce Plugin Installation
3.1 After logging into the admin area of your website, you need to click on the Plugins menu on the left, and click on the “Add New” button.

3.2 Next step, click “Upload Plugin”.

choose the downloaded file (p. 2.2.) and click the “Install Now” button:

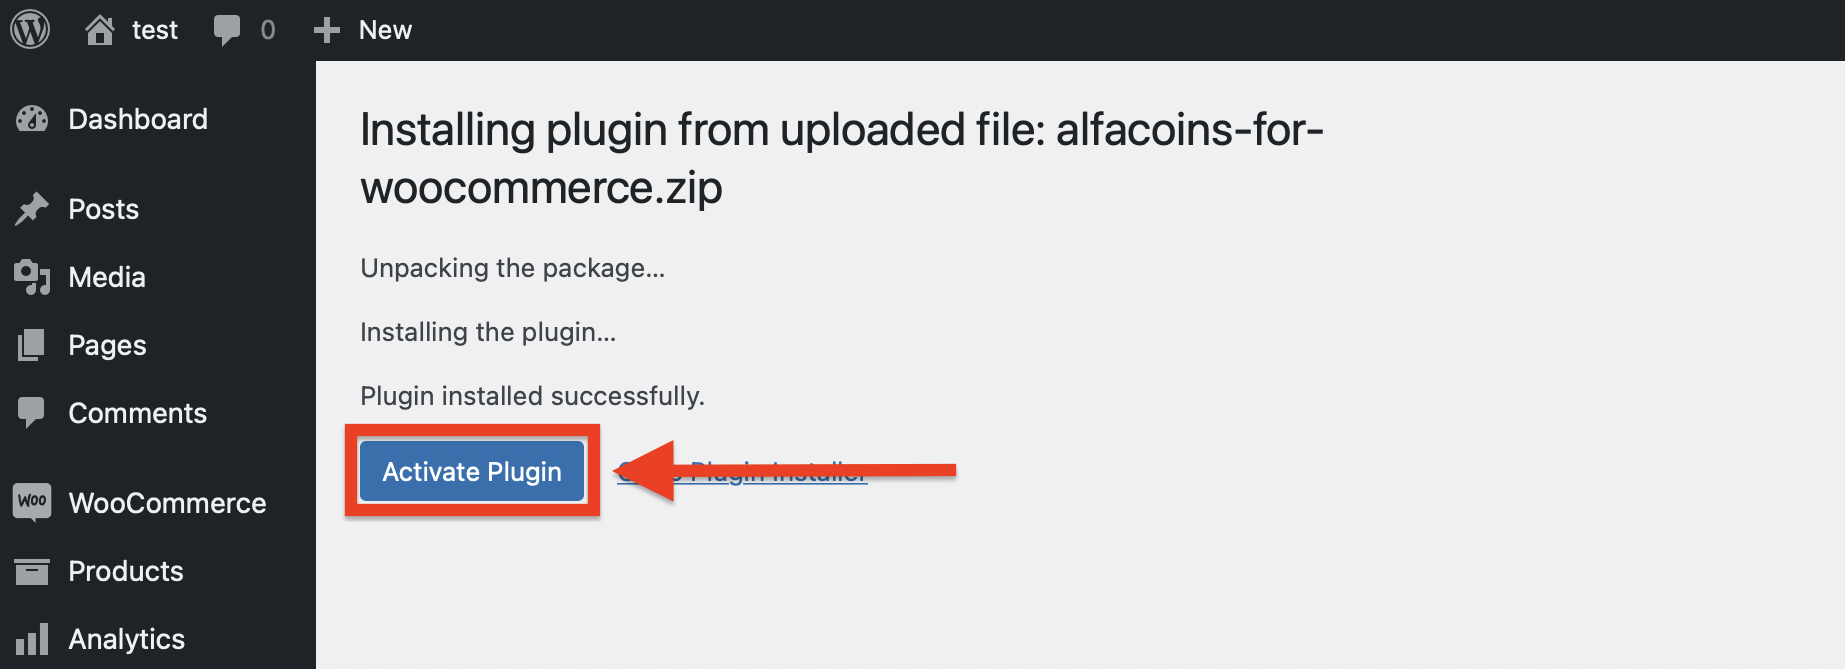
3.3 After a successful installation, click on the “Activate Plugin” button.
4. ALFAcoins Woocommerce Plugin Installation
4.1 After plugin activation, you need to go to the Plugins page and find ALFAcoins for Woocommerce there. Then click on the Settings.

4.2 Enter the API data obtained in the process of API creation:
a. API Project Title (from p. 1.a section of this guide)
b. API Secret Key (from p. 1.g section of this guide)
c. API Password (from p. 1.h section of this guide)

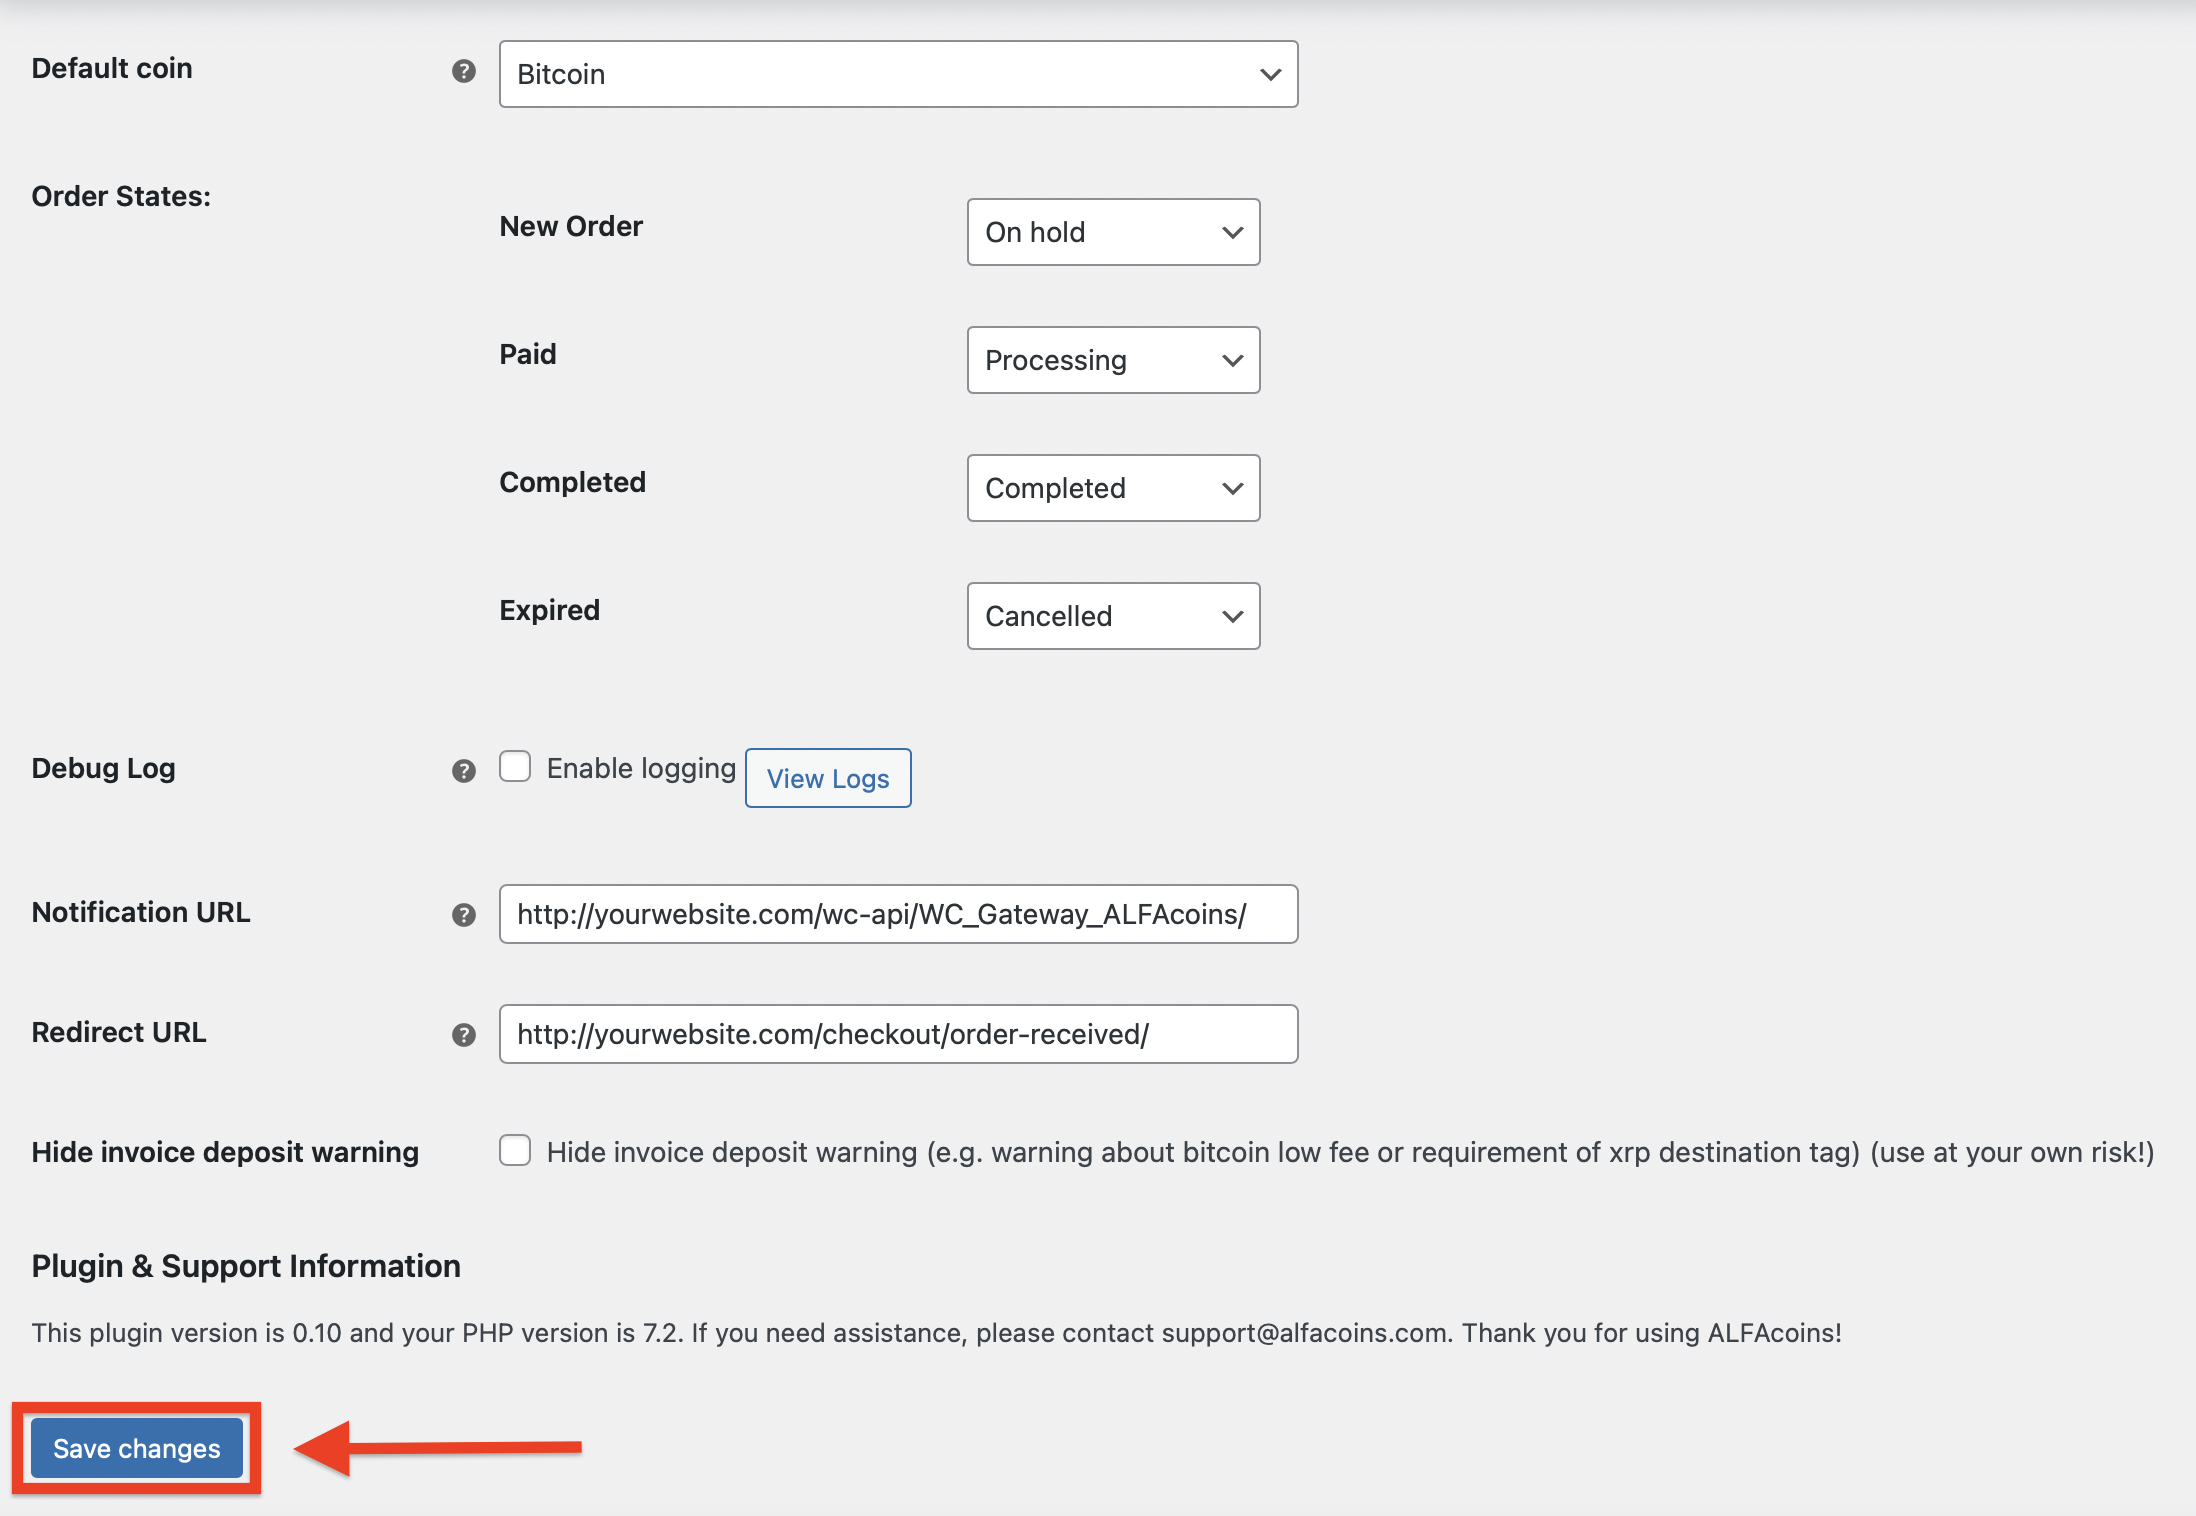
4.3 Select the default cryptocurrency for payments (e.g. Bitcoin). Indicate the order status transitions (same as on the example screenshot), and set the Notification URL and Redirect URL. Don’t forget to replace https://yourwebsite.com with your actual website!
Click on the “Save Changes” after filling in all required fields.
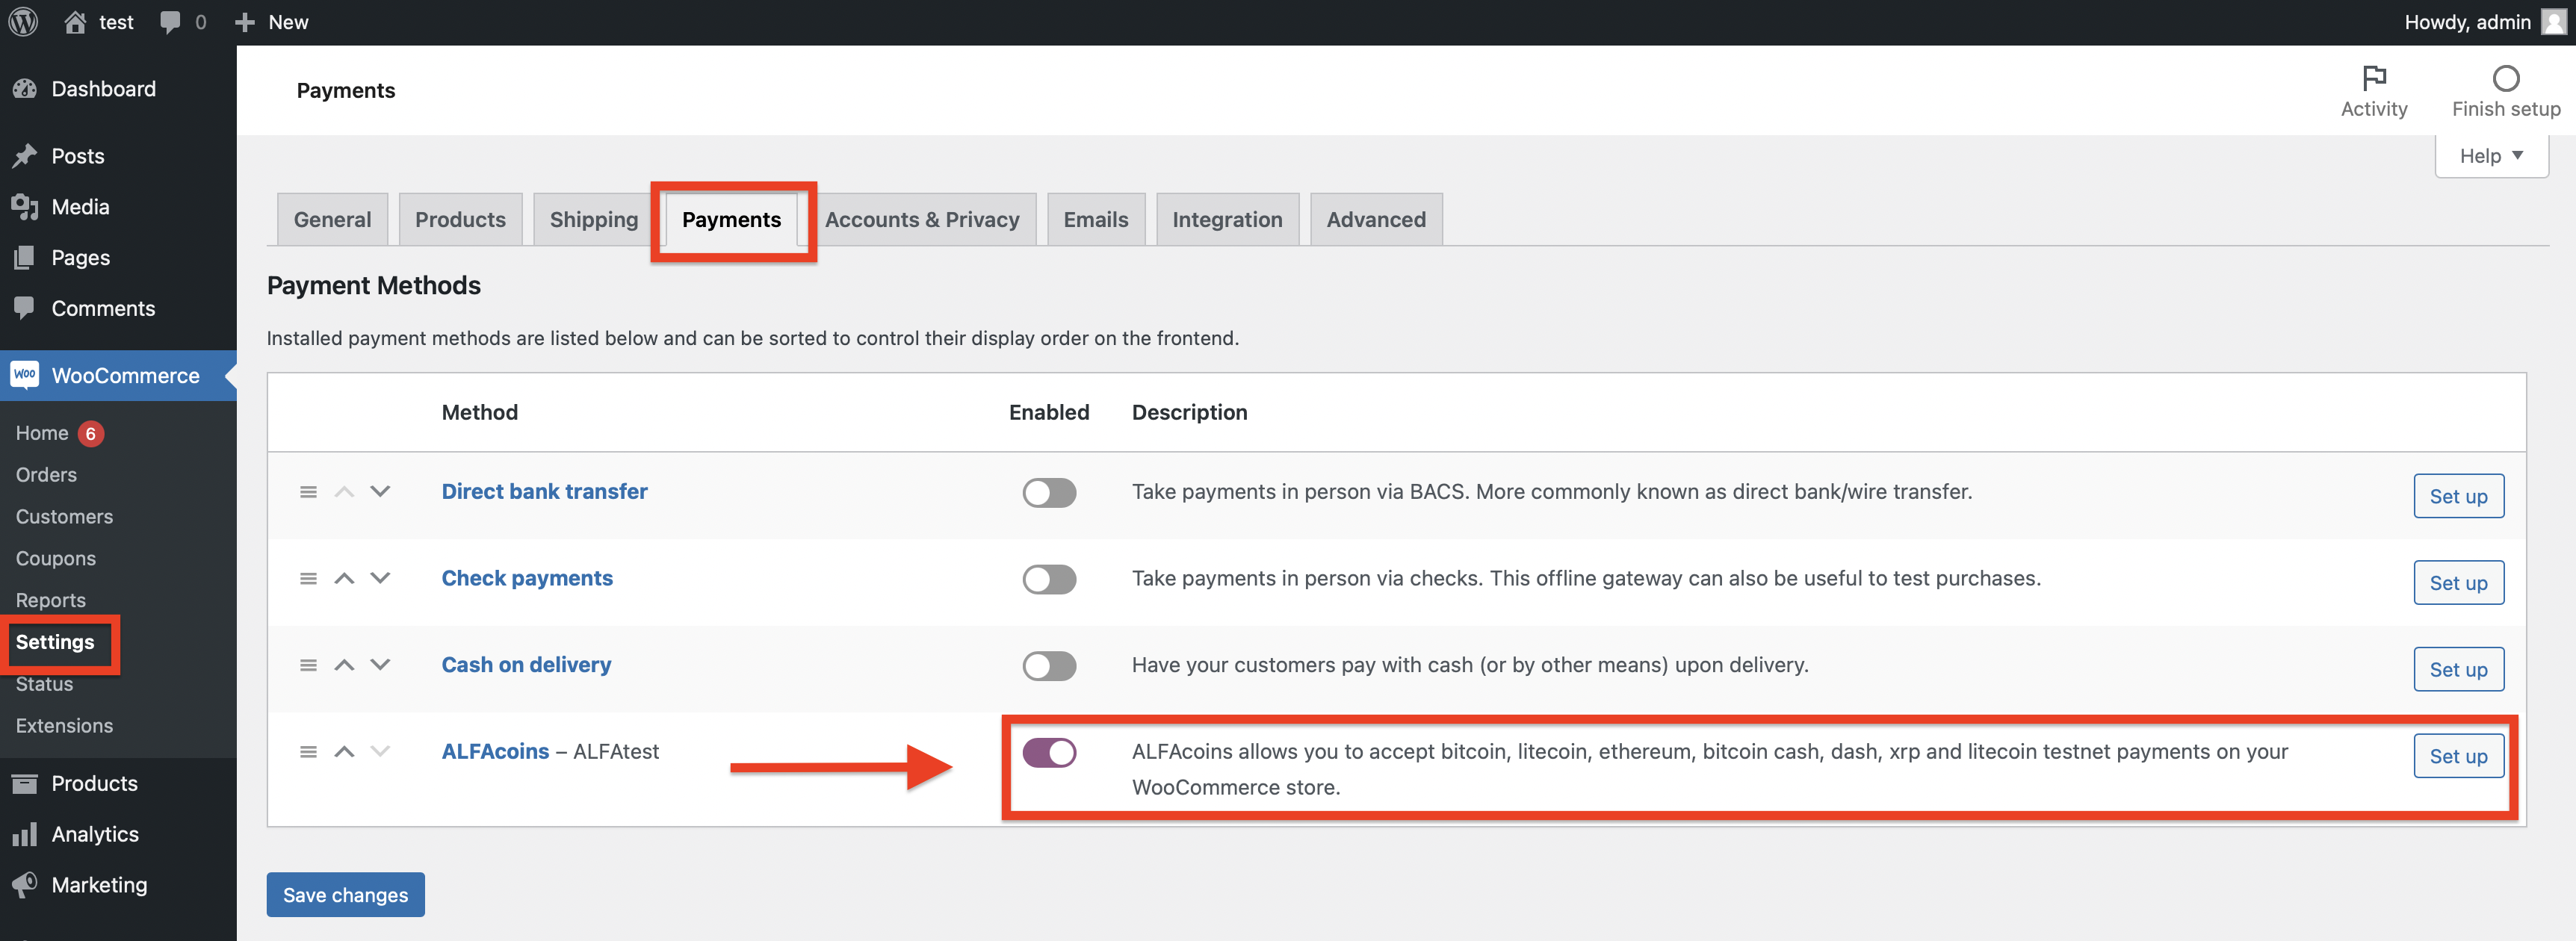
4.4 Now, you need to make sure that everything went well: go to the Woocommerce on the left menu, select Settings → Payments, and make sure that the ALFAcoins plugin for Woocommerce is enabled.
Congratulations!
Now you can accept cryptocurrency payments on your website!
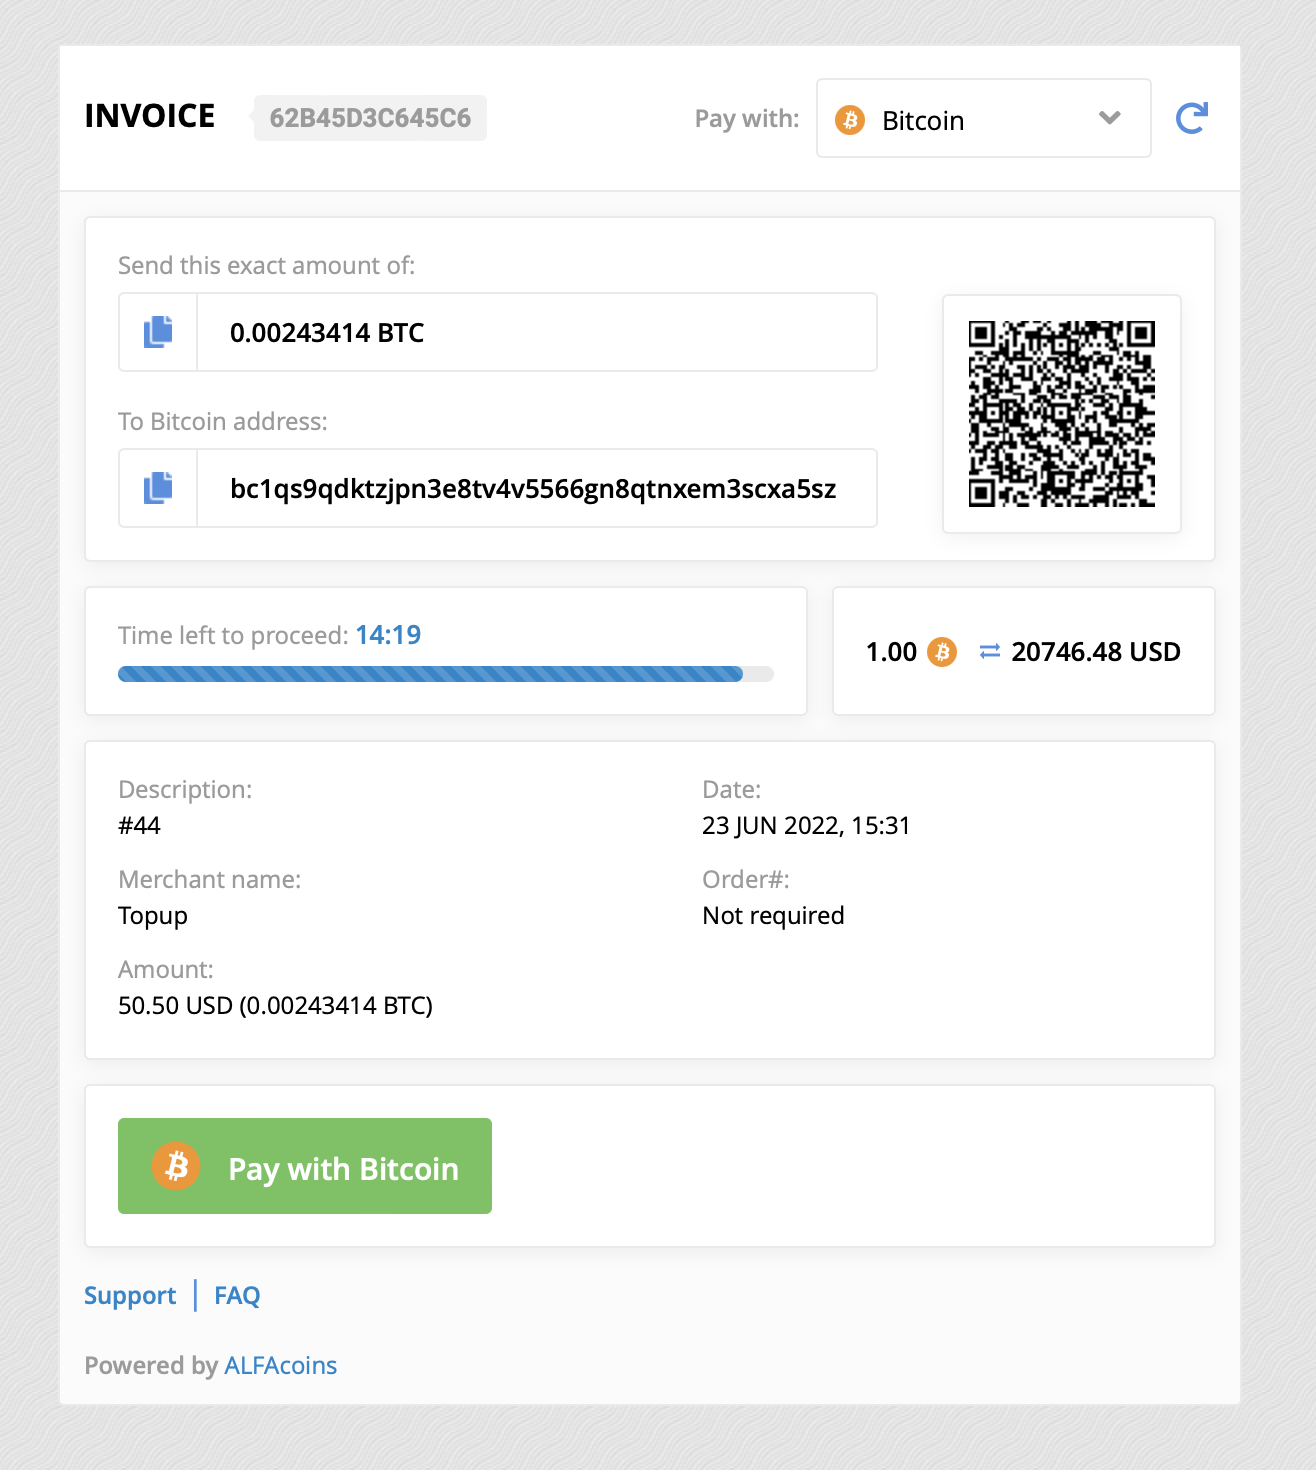
After your customer creates the order in your online shop, they will receive the invoice to pay.
The payment page will look like this:
If something is not working or you’re having an issue in setting up your store, don’t hesitate to ask our support team!